Club Scuderia
-
Please take a minute to read this thread about our recent server issues and forum platform Switch
You are using an out of date browser. It may not display this or other websites correctly.
You should upgrade or use an alternative browser.
You should upgrade or use an alternative browser.
F430 New owner diary inc. maintenance & upgrades
- Thread starter MWStewart
- Start date


Modificato
New member
A few weeks ago I had a call with Aldous at AV to say that my ECUs were at the top of 360Trev's list for recalibration work. Very excited to experience the results of that, and hoping that I'll end up with some of the extra low down grunt that my MY06 car had.
MOT on Saturday. Looking forward to driving it.
Don’t forget early cars had quite different air inlet ducts with small branch plenums.
It could be acoustic treatments but it could also be Yamaha style YICS devices to provide low/range power smoothing /boosting.
Will be fascinating to see what Trev throws up.


Modificato
New member
My wife and I are away in the car for a three week road trip. Currently in Tuscany. Approximately 1,400 miles in at the moment - a few issues to report, but lots of smiles. I'll update when home.
View attachment 158205
Must have passed each other we were there this weekend.
Modificato
New member
We were there all week, but Tuscany's a big place! Never a disappointment.
Our place is just over the border in Umbria.
The old Mille Miglia routes are just brilliant.
One off the things I am going to do when I live there permanently is give guided tours for sections of the route(s) based on old road books and maps.
Might have a rule of only Ferrari's allowed LOL
Modificato
New member
PS Mark,
This years Mille Miglia goes past Lago Trasimeno via Passiginano where there is a great old flying boat factory and associated history - The farm is at the top of the Hill from
San Vito sul trasimeno - you can check on progress...
This years Mille Miglia goes past Lago Trasimeno via Passiginano where there is a great old flying boat factory and associated history - The farm is at the top of the Hill from
San Vito sul trasimeno - you can check on progress...
This post is part one of a two part maintenance log that was performed ahead of my recent trip. Without fail there is always something to attend to on this car.
AC Service
During the last road trip I noticed that vent temperature was not as low as it should be, so I decided to have the A/C system serviced with new gas, lubricant, and receiver/dryer. The OEM part is cheap at £25, but a quick browse on the Internet revealed that it looks to be the same unit used in some Land Rover models with alternative part number JRJ100550, so there should be an alternative source if ever Ferrari discontinue the part.

I use a local F1 Autocentre for tracking & A/C as I've always found them to be very good; they were kind enough to disrupt the refill cycle to let me fit the new dryer, which took only five minutes because I'd removed the wipers and scuttle panel prior to arriving at F1.


The owners manual lists the R 134 A capacity as 800 ± 30 g, and mine was down to 536 - so no surprise that the system wasn't cooling as effectively as it should. The system passed the vac test and was refilled with 800g.

AC Compressor Engagement Issue
I had an intermittent A/C compressor engagement issue. The electronics side is simple to diagnose with two main circuits:
1) Control
The HVAC panel is the control source, with a 12v switched live output passing through a combination high pressure/low pressure switch to pin 40 on the right-hand-side engine ECU.
2) Load
If the right-hand-side engine ECU is satisfied that the correct engine operating conditions exist for compressor activation i.e. not at WOT etc. then pin 22 is earthed, which is wired to the earth side of the compressor activation relay (PSR1) in the left hand side central junction box (CBL9). The coil is fed from fuse PDF12 in the right hand side central junction box (CBR9), but jointly it supplies other key components which were OK in my car therefore I skipped a check. The load side of the relay is fed from 15a fuse PSF19 in the left hand side central junction box (CBL9)
In my case the fuses and relay were fine. I tested compressor activation at idle by briefly earthing the compressor relay coil, knowing that the issue was very unlikely to lie within the engine ECU itself - the compressor clutch clicked on. I knew that the load side of the circuit was OK so next I turned my attention to the pressure switch behind the access panel in the front luggage compartment, as that's a point where I could test for the incoming switched live from the HAC panel - which could be a possible root case - and check status of the switch; if pressure is either too high or too low then the switch will remain open and prevent compressor engagement.
I found the root cause to be something unexpected: the locking barb for the electrical connector had obviously weakened over time and had allowed the connector to migrate away from the switch body, leading to a poor connection. I fixed this by packing the connector body with a piece of plastic which forced the locking barb onto the switch, but later on when I have more time I shall replace the connector with a new part.

Becker Aux Lead
My car had the optional iPod interface which I used for a couple of years but lately it wasn't of any use to me. I removed the interface to swap with a simple 3.5mm input aux cable which would provide more flexibility.
The Becker head units uses the old mini ISO connectors for the various auxiliary functions that may be added. As my car was optioned with sat nav, I found that the powered GPS antenna was wired to the 'powered radio aerial' pins on the blue connector, so I used some cheap Chinese pin extraction tools to add the GPS antennae power wires to the new blue aux plug.


A small cable tie to protect the wires from being pulled out of the housing, and the new aux lead was good to go.

Brakes
Whilst cleaning and inspecting the brakes I noticed an issue: the masking for the powder coat job I had done during the last refurb had missed the 4mm bare metal area around the circumference of the pistons. The new powder coat was too close to the piston bores, had begun to deteriorate, and would very likely lead to a future issue. This was an unwanted discovery, but despite limited time left before the trip I decided to strip and rebuild the front calipers.

I used a Dremel to remove the unwanted powder coat, and thoroughly cleaned out the calipers with brake cleaner. New seals, naturally. My Dad very kindly re-polished all of the pistons.

I use a pressure bleeder to refresh the fluid, and here is the business end of the operation. Previously I used a piece of tube pushed over the bleed nipple but it was always prone to weeping, so I've upgraded to a moulded rubber push on fitting which works perfectly - now the whole operation is completely dry.

I took the opportunity to de-glaze the pads with some 80 grit wet-and-dry paper.

AC Service
During the last road trip I noticed that vent temperature was not as low as it should be, so I decided to have the A/C system serviced with new gas, lubricant, and receiver/dryer. The OEM part is cheap at £25, but a quick browse on the Internet revealed that it looks to be the same unit used in some Land Rover models with alternative part number JRJ100550, so there should be an alternative source if ever Ferrari discontinue the part.
I use a local F1 Autocentre for tracking & A/C as I've always found them to be very good; they were kind enough to disrupt the refill cycle to let me fit the new dryer, which took only five minutes because I'd removed the wipers and scuttle panel prior to arriving at F1.
The owners manual lists the R 134 A capacity as 800 ± 30 g, and mine was down to 536 - so no surprise that the system wasn't cooling as effectively as it should. The system passed the vac test and was refilled with 800g.
AC Compressor Engagement Issue
I had an intermittent A/C compressor engagement issue. The electronics side is simple to diagnose with two main circuits:
1) Control
The HVAC panel is the control source, with a 12v switched live output passing through a combination high pressure/low pressure switch to pin 40 on the right-hand-side engine ECU.
2) Load
If the right-hand-side engine ECU is satisfied that the correct engine operating conditions exist for compressor activation i.e. not at WOT etc. then pin 22 is earthed, which is wired to the earth side of the compressor activation relay (PSR1) in the left hand side central junction box (CBL9). The coil is fed from fuse PDF12 in the right hand side central junction box (CBR9), but jointly it supplies other key components which were OK in my car therefore I skipped a check. The load side of the relay is fed from 15a fuse PSF19 in the left hand side central junction box (CBL9)
In my case the fuses and relay were fine. I tested compressor activation at idle by briefly earthing the compressor relay coil, knowing that the issue was very unlikely to lie within the engine ECU itself - the compressor clutch clicked on. I knew that the load side of the circuit was OK so next I turned my attention to the pressure switch behind the access panel in the front luggage compartment, as that's a point where I could test for the incoming switched live from the HAC panel - which could be a possible root case - and check status of the switch; if pressure is either too high or too low then the switch will remain open and prevent compressor engagement.
I found the root cause to be something unexpected: the locking barb for the electrical connector had obviously weakened over time and had allowed the connector to migrate away from the switch body, leading to a poor connection. I fixed this by packing the connector body with a piece of plastic which forced the locking barb onto the switch, but later on when I have more time I shall replace the connector with a new part.
Becker Aux Lead
My car had the optional iPod interface which I used for a couple of years but lately it wasn't of any use to me. I removed the interface to swap with a simple 3.5mm input aux cable which would provide more flexibility.
The Becker head units uses the old mini ISO connectors for the various auxiliary functions that may be added. As my car was optioned with sat nav, I found that the powered GPS antenna was wired to the 'powered radio aerial' pins on the blue connector, so I used some cheap Chinese pin extraction tools to add the GPS antennae power wires to the new blue aux plug.
A small cable tie to protect the wires from being pulled out of the housing, and the new aux lead was good to go.
Brakes
Whilst cleaning and inspecting the brakes I noticed an issue: the masking for the powder coat job I had done during the last refurb had missed the 4mm bare metal area around the circumference of the pistons. The new powder coat was too close to the piston bores, had begun to deteriorate, and would very likely lead to a future issue. This was an unwanted discovery, but despite limited time left before the trip I decided to strip and rebuild the front calipers.
I used a Dremel to remove the unwanted powder coat, and thoroughly cleaned out the calipers with brake cleaner. New seals, naturally. My Dad very kindly re-polished all of the pistons.
I use a pressure bleeder to refresh the fluid, and here is the business end of the operation. Previously I used a piece of tube pushed over the bleed nipple but it was always prone to weeping, so I've upgraded to a moulded rubber push on fitting which works perfectly - now the whole operation is completely dry.
I took the opportunity to de-glaze the pads with some 80 grit wet-and-dry paper.
Trip prep part two of two.
Water Pump
This car has a penchant for providing surprises at inopportune times, which in fairness may sometimes be attributed to a lack of use, and this was likely one of those cases: a small pool of antifreeze on the inside of under tray one week before we were due to leave. Coolant was visibly seeping from the join between the two sections of water pump.


The next morning I went back to the car expecting to find another pool, but it was dry. I ran the engine up to temp, and still no further sign of a leak which was quite fortuitous. I spoke to a chap called Joel who provides rebuild kits for these pumps and he reported not seeing any catastrophic failures, so I was happy to proceed with the trip.

The problem hasn't occurred since but I've taken it as a cue to rebuild the water & dry sump pump over winter using one of Joel's kits.
Rear Bumper
One part of the Scuderia rear bumper design that I've never really been happy with is the black grille area above the diffuser and around the exhaust tips. If like in my case the rear diffuser is carbon then the whole area becomes a little bit featureless. To provide a better demarcation between the carbon diffuser and the rest of the bumper I had omitted the black grille, but I still wasn't completely happy with the look, so I've now had all of the mounting holes for the grille filled with epoxy and I've painted the area in grey.

Fluid Service
I've changed the antifreeze, brake fluid, and cabin air filter. From memory I managed to remove 11 litres of antifreeze after leaving the car on an incline to drain overnight.


PAS Reservoir Cap
Oil mist was emanating from the power steering reservoir and making its way to the top of the gearbox. I don't like oil mist anywhere in the engine bay of this car, so I replaced the cap ring with one for a BMW after observing that the reservoir was a generic ZF item that is used on various cars - Ferrari sell only the complete reservoir.

Steering Rack
Ferrari had noted in my last service that the power steering rack was leaking and recommended that it was replaced. I suspected that wasn't the case, and it was in fact silicone lubricant on the gaiter from where I had adjusted the coilovers. I investigated and found the steering rack to be perfectly fine.

Suspension Service
I've applied silicone to all anodised components in order to preserve them. I've also sprayed PTFE into the suspension flamblocs, and various joints in the Spider roof assembly.

Scuderia Undertray
I had the bodyshop refurbish the front Scuderia undertray because it had a few scuffs. The painter thought that I was a few sandwiches short of a picnic")

Whilst on the subject of undertrays...the Scuderia rear undertray saves additional weight by incorporating mounting bosses for two fastening locations which on the F430 are made up with steel brackets. I didn't take this into account in my previous weight saving calculations. It just goes to show the lengths that Ferrari went to.


Cleaning
The rest of the prep was cleaning and checking various fastenings around the car - the flat plane crank causes a lot of vibration. I steam cleaned behind the rear bumper and other hidden areas.


And finally, thanks to my friend Carlo in Italy for kindly donating some Scuderia seat fabric to enable me to retrim my bulkhead luggage nets, some spare market lights, and a paint code decal for my carbon bonnet.

Water Pump
This car has a penchant for providing surprises at inopportune times, which in fairness may sometimes be attributed to a lack of use, and this was likely one of those cases: a small pool of antifreeze on the inside of under tray one week before we were due to leave. Coolant was visibly seeping from the join between the two sections of water pump.
The next morning I went back to the car expecting to find another pool, but it was dry. I ran the engine up to temp, and still no further sign of a leak which was quite fortuitous. I spoke to a chap called Joel who provides rebuild kits for these pumps and he reported not seeing any catastrophic failures, so I was happy to proceed with the trip.
The problem hasn't occurred since but I've taken it as a cue to rebuild the water & dry sump pump over winter using one of Joel's kits.
Rear Bumper
One part of the Scuderia rear bumper design that I've never really been happy with is the black grille area above the diffuser and around the exhaust tips. If like in my case the rear diffuser is carbon then the whole area becomes a little bit featureless. To provide a better demarcation between the carbon diffuser and the rest of the bumper I had omitted the black grille, but I still wasn't completely happy with the look, so I've now had all of the mounting holes for the grille filled with epoxy and I've painted the area in grey.
Fluid Service
I've changed the antifreeze, brake fluid, and cabin air filter. From memory I managed to remove 11 litres of antifreeze after leaving the car on an incline to drain overnight.
PAS Reservoir Cap
Oil mist was emanating from the power steering reservoir and making its way to the top of the gearbox. I don't like oil mist anywhere in the engine bay of this car, so I replaced the cap ring with one for a BMW after observing that the reservoir was a generic ZF item that is used on various cars - Ferrari sell only the complete reservoir.
Steering Rack
Ferrari had noted in my last service that the power steering rack was leaking and recommended that it was replaced. I suspected that wasn't the case, and it was in fact silicone lubricant on the gaiter from where I had adjusted the coilovers. I investigated and found the steering rack to be perfectly fine.
Suspension Service
I've applied silicone to all anodised components in order to preserve them. I've also sprayed PTFE into the suspension flamblocs, and various joints in the Spider roof assembly.
Scuderia Undertray
I had the bodyshop refurbish the front Scuderia undertray because it had a few scuffs. The painter thought that I was a few sandwiches short of a picnic
Whilst on the subject of undertrays...the Scuderia rear undertray saves additional weight by incorporating mounting bosses for two fastening locations which on the F430 are made up with steel brackets. I didn't take this into account in my previous weight saving calculations. It just goes to show the lengths that Ferrari went to.
Cleaning
The rest of the prep was cleaning and checking various fastenings around the car - the flat plane crank causes a lot of vibration. I steam cleaned behind the rear bumper and other hidden areas.
And finally, thanks to my friend Carlo in Italy for kindly donating some Scuderia seat fabric to enable me to retrim my bulkhead luggage nets, some spare market lights, and a paint code decal for my carbon bonnet.
Modificato
New member
As always, great updates.
Looking forward to the trip report
Looking forward to the trip report
As always, great updates.
Looking forward to the trip report
+1.
Modificato
New member
This year we were based in Pienza, which is less of a challenge on the knees than Montepulciano, our previous location - so, as you know, just west of the area you mention. Always a delight and, from many years of experience, mid to end May a great time to be there.
Some great driving roads around that area:
The Stosa Kitchen Factory nearby is a major time-check-top on the Mille Miglia and the route from there to Radicofani, Siena, San Gimignano, and onto the Pass Del Futa is arguably the highlight of the race.
Locals enjoy an Italian car driven quickly too!
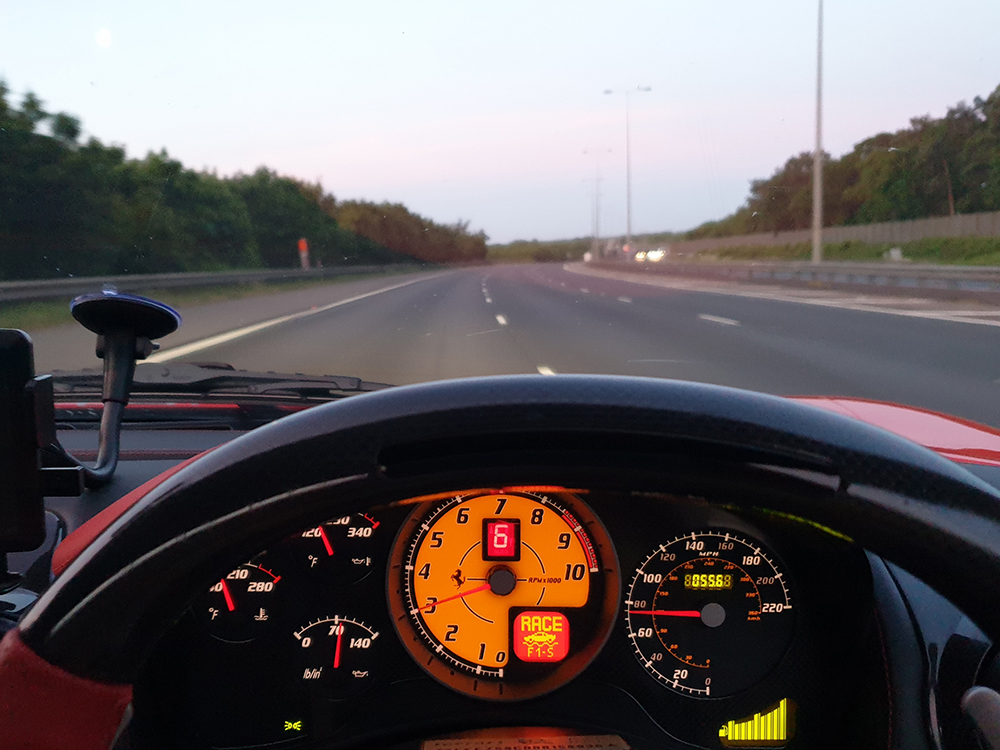
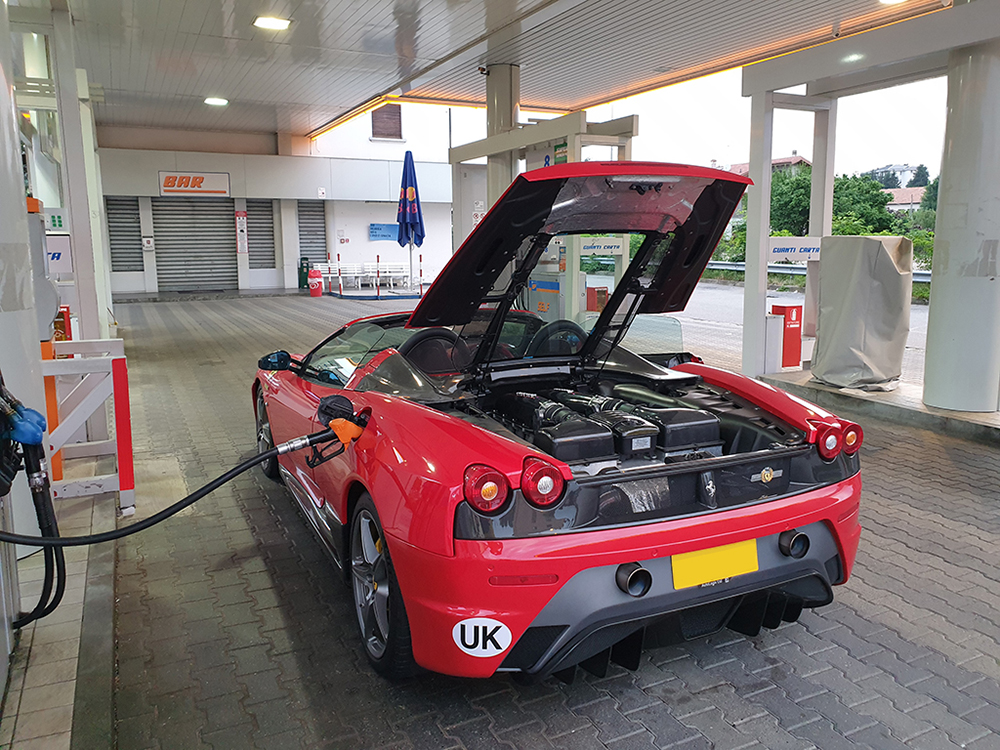
Catching up on some updates on a road trip into Europe. We left around 5am to catch the LeShuttle. The UK roads were pleasantly clear.
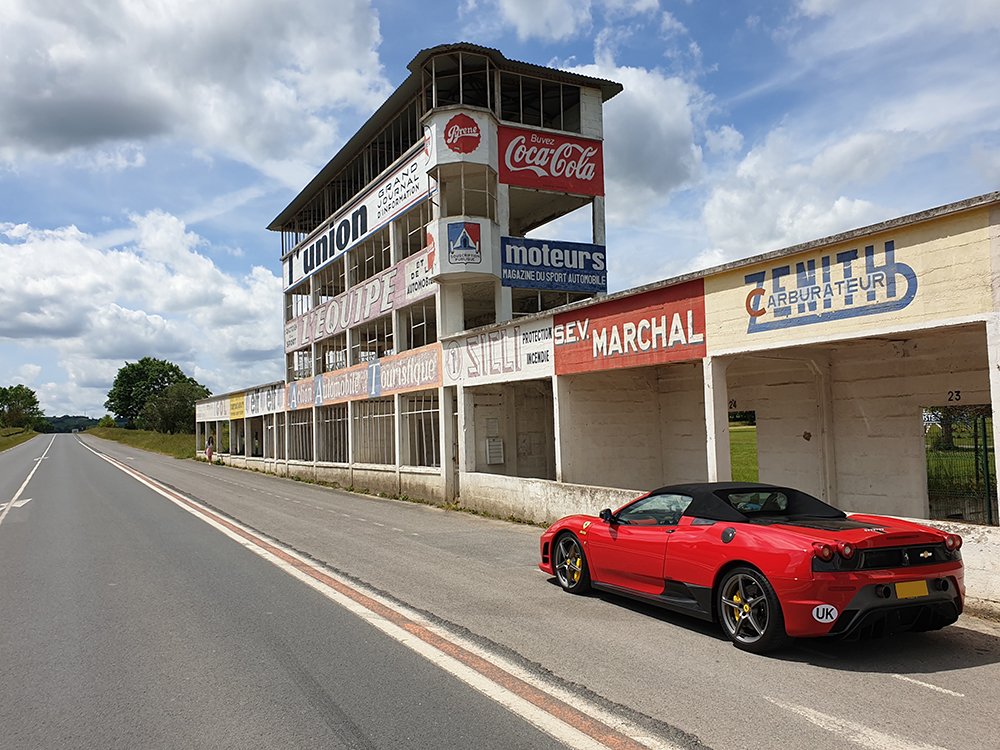
Obligatory Reims-Gueux shot.
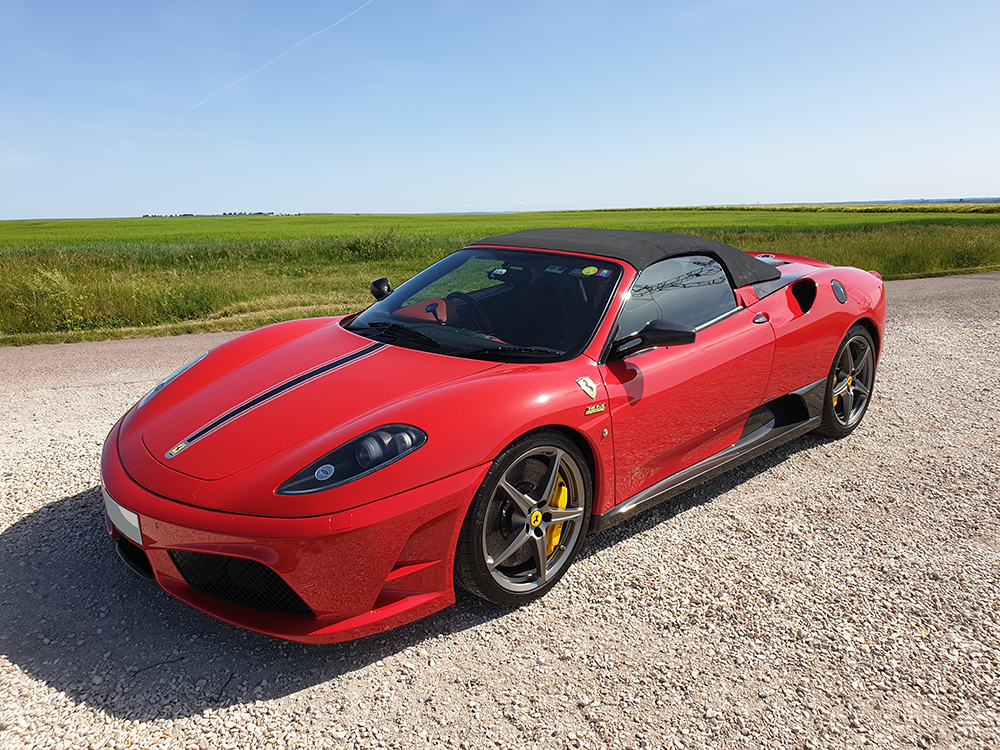
We went down through the Forêt d'Orient national park. It was absolutely sweltering so roof up during the midday sun - wife was pregnant during this trip.
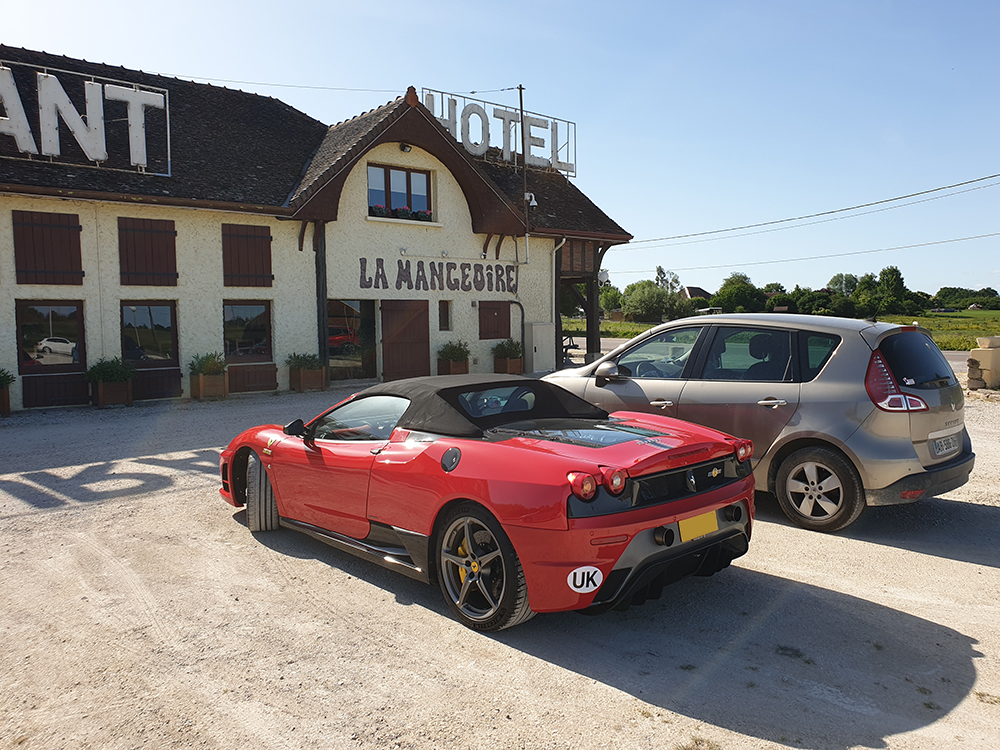
Stopped for a drink here. I didn't plan anything in-between accommodation stops - we just went with the flow. It was very traditional French backwater inside, which I like.
Next step Switzerland...

Obligatory Reims-Gueux shot.
We went down through the Forêt d'Orient national park. It was absolutely sweltering so roof up during the midday sun - wife was pregnant during this trip.
Stopped for a drink here. I didn't plan anything in-between accommodation stops - we just went with the flow. It was very traditional French backwater inside, which I like.
Next step Switzerland...

Our route into Switzerland was via the Mont-Blanc tunnel, as this would save us a little bit of time. It was still fairly chilly at altitude - very different to France earlier that day.
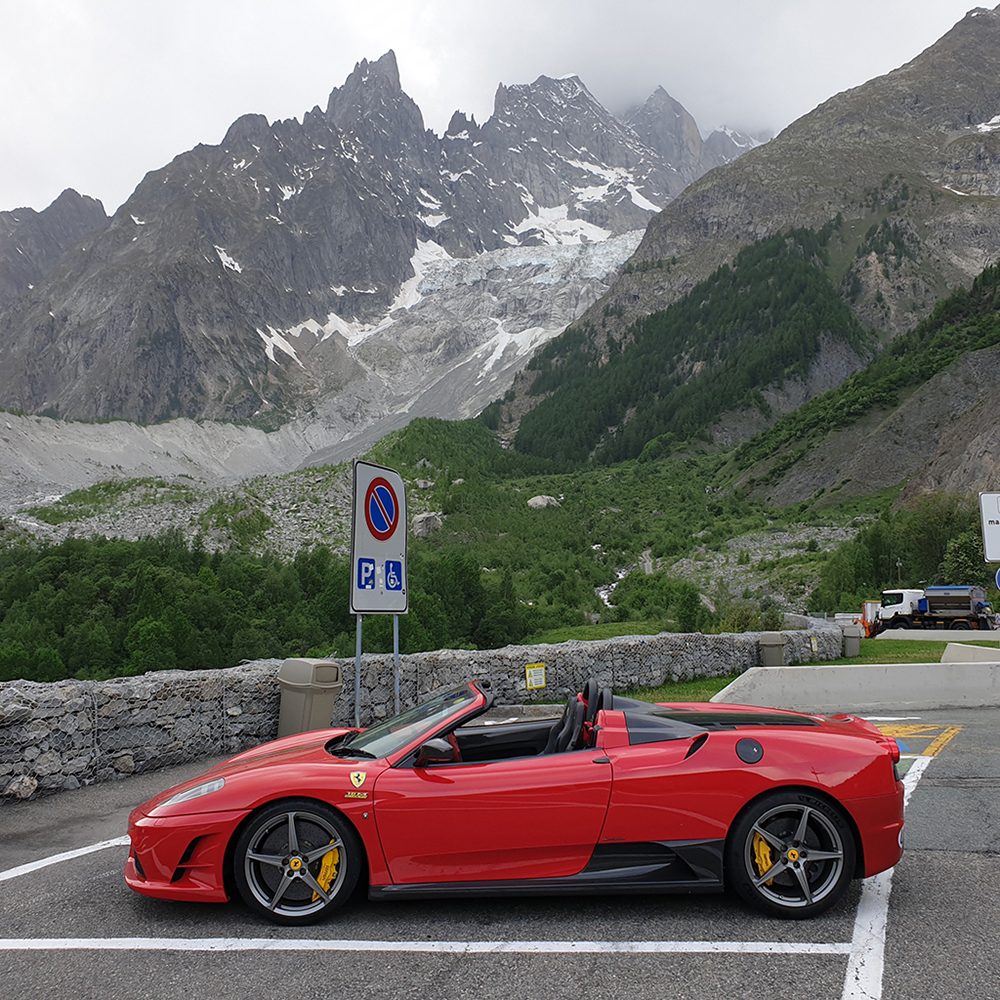
We arrived at the hotel later in the evening as I'd been distracted by a few nice back roads The kitchen had closed, but the owner opened it for us and served dinner and a drinks.Excellent.
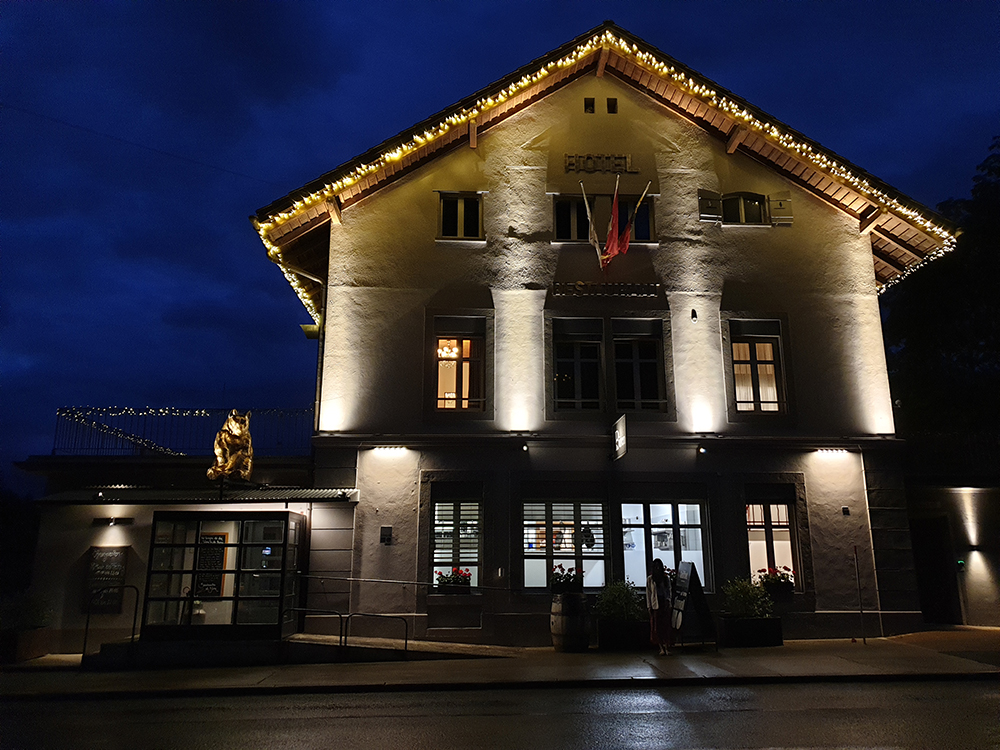
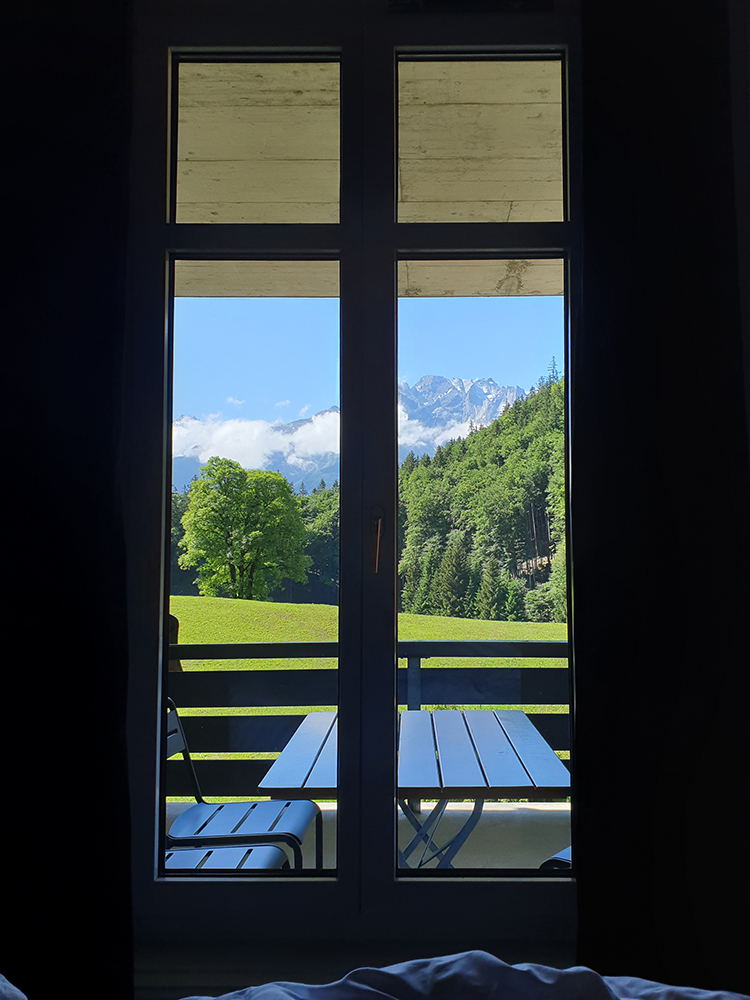
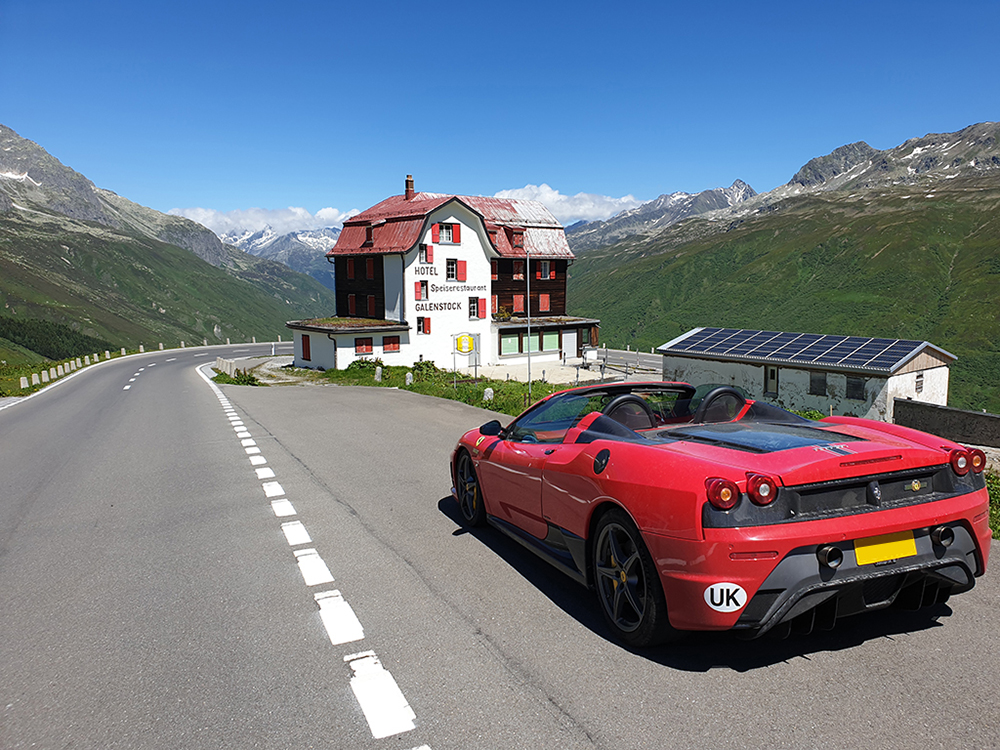
It was very nice to wake up to clear skies and a nice view.
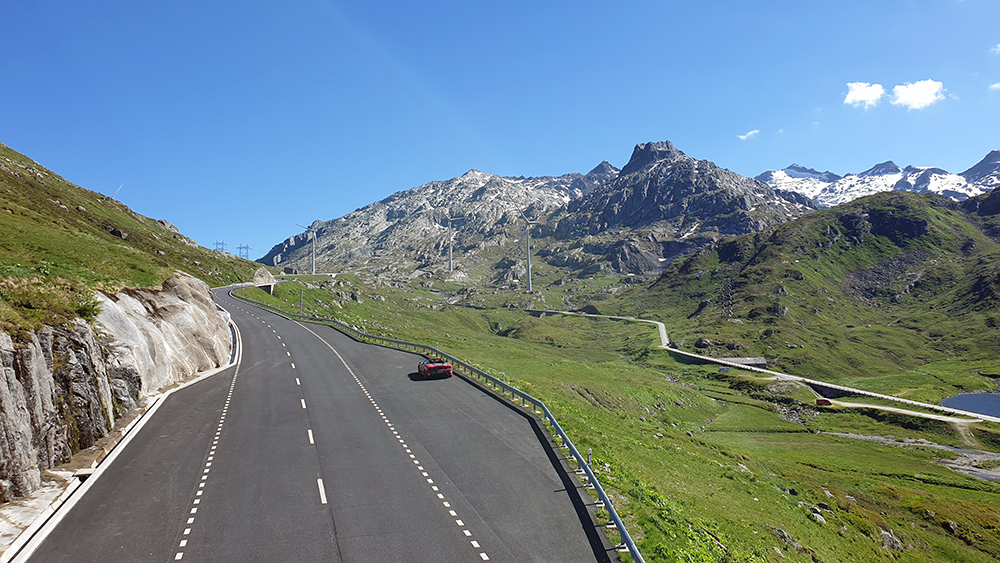
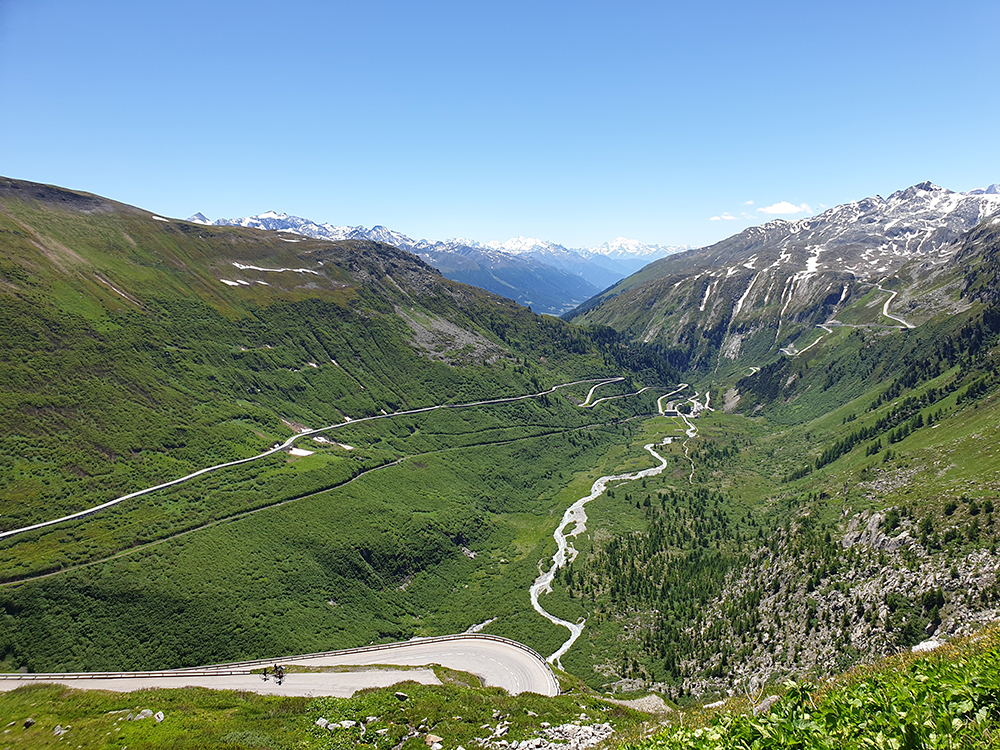
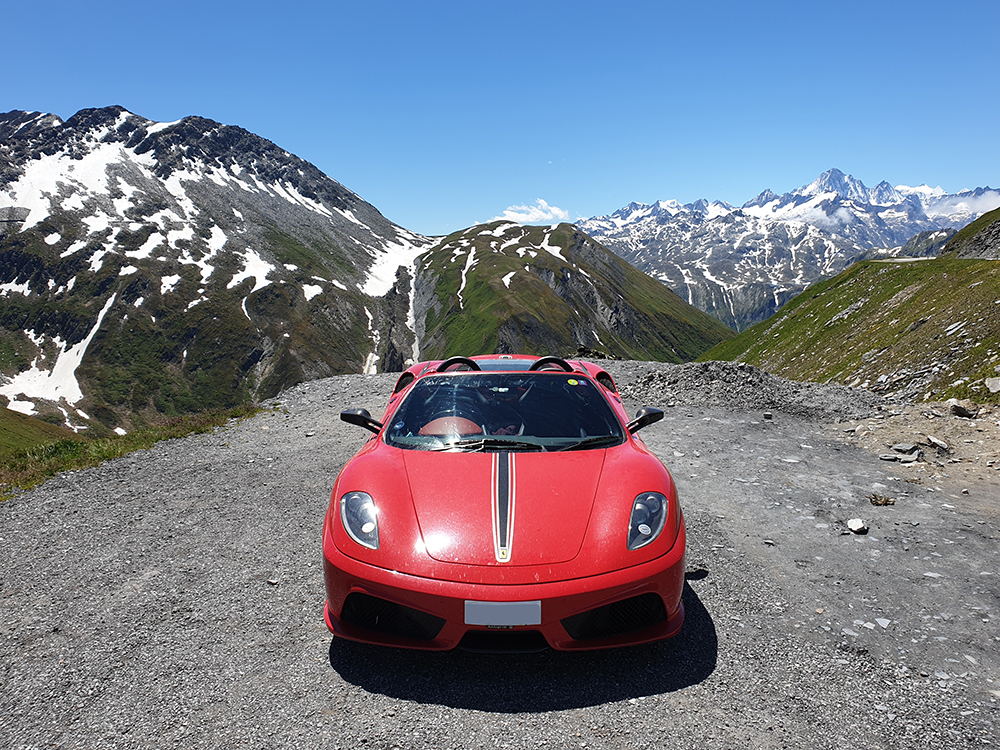
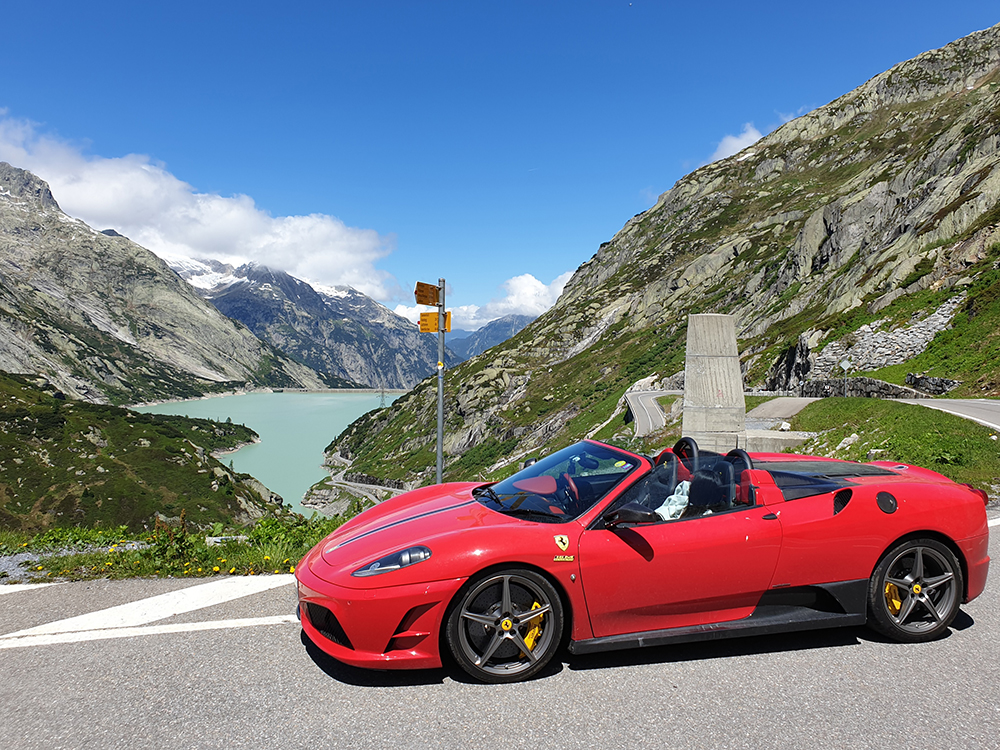
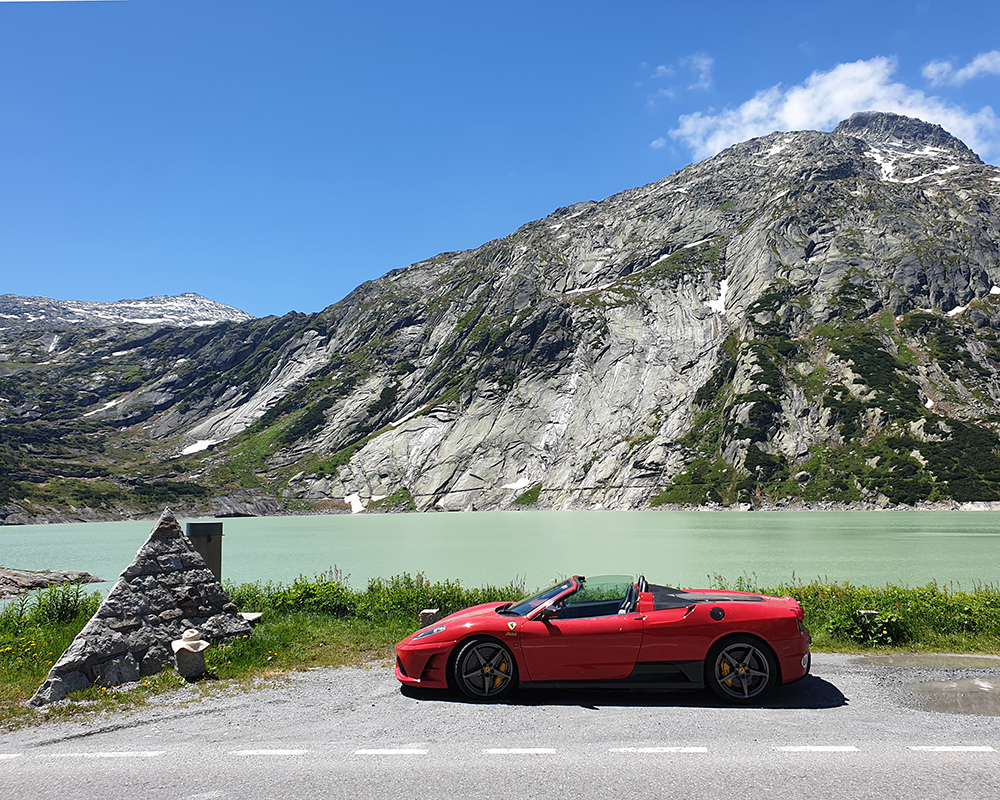
I normally plan these trips outside of peak time and school holidays, but even so we were extremely lucky with the traffic situation; the Swiss passes are well-known in motoring circles so there's always a bit of traffic, but I had several of the passes completely to myself. I had to be a bit careful to not shake my wife around too much, but I turned round to drive some of them more than once. Despite not going anywhere near 10/10ths these were some of my most memorable drives to date.

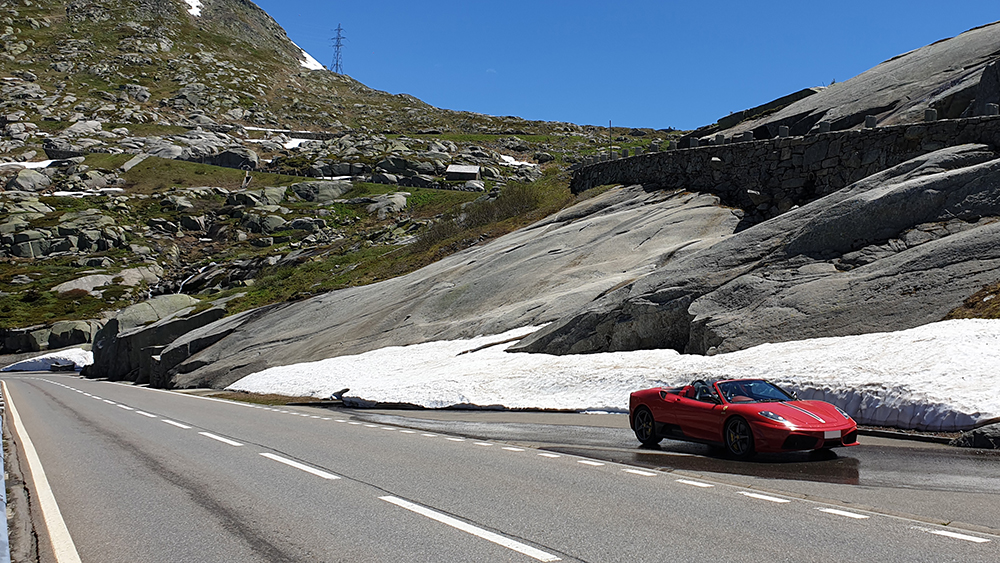
Out of season ski resorts always have a '28 Days Later' feel about them.
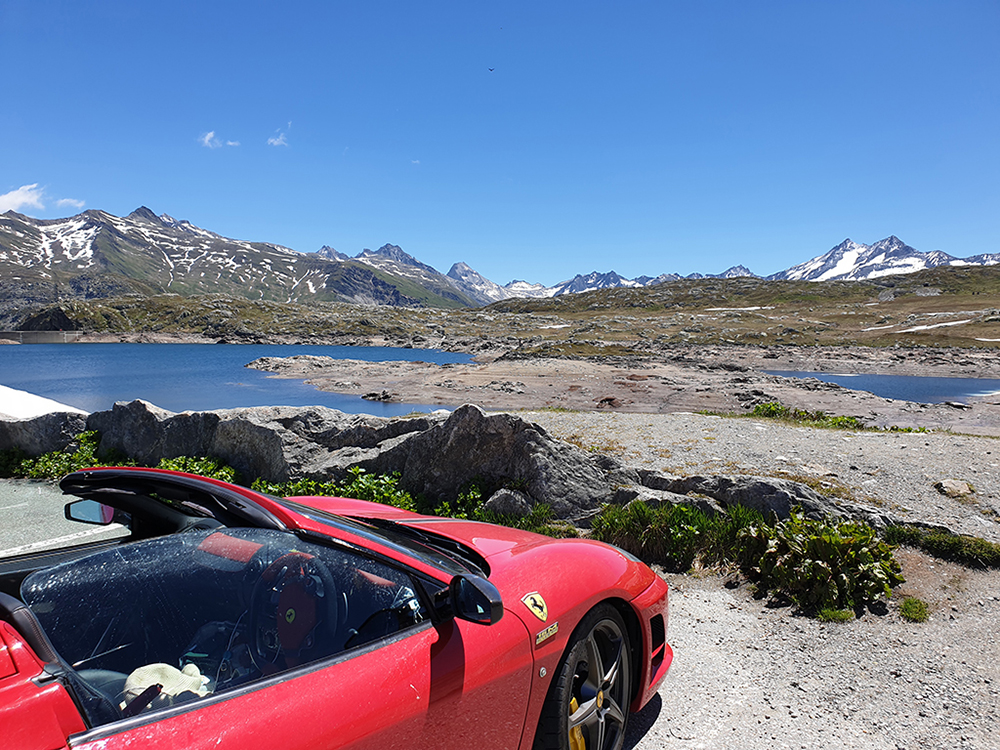
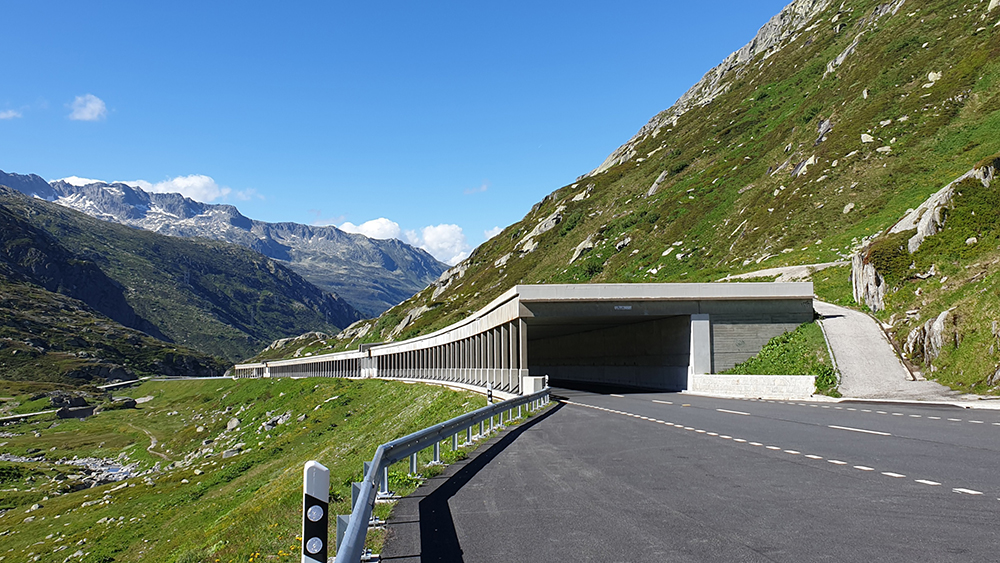
Some of the scenery and a view looking down at one of the passes.
A fantastic piece of civic architecture.
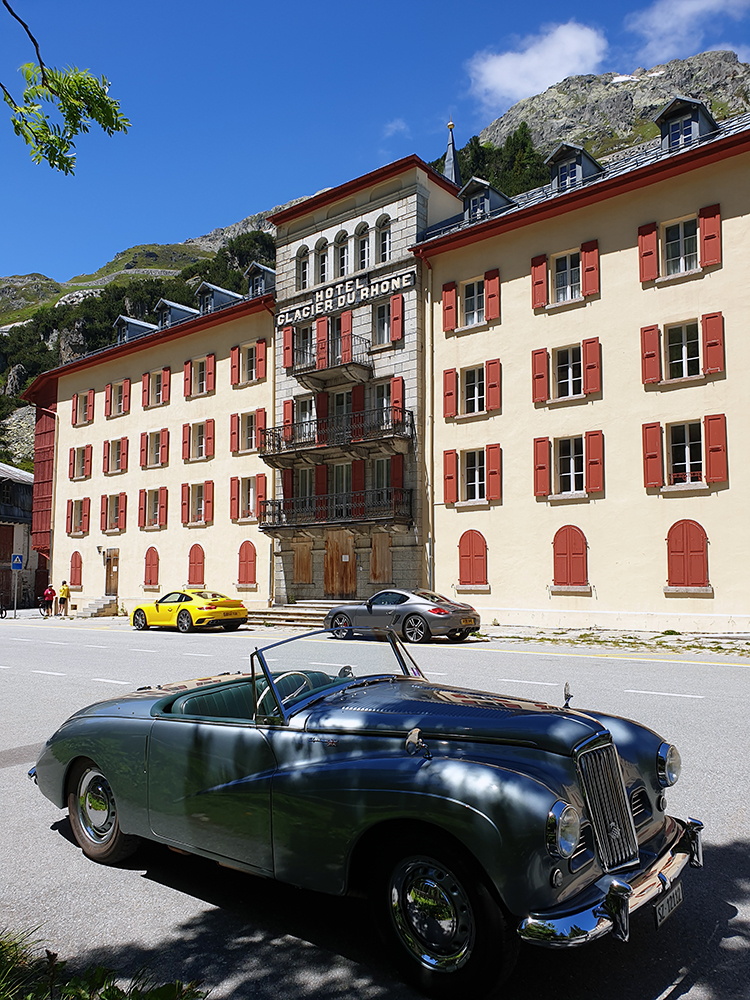
We came across a group of UK registered Porsche's driving through the passes.
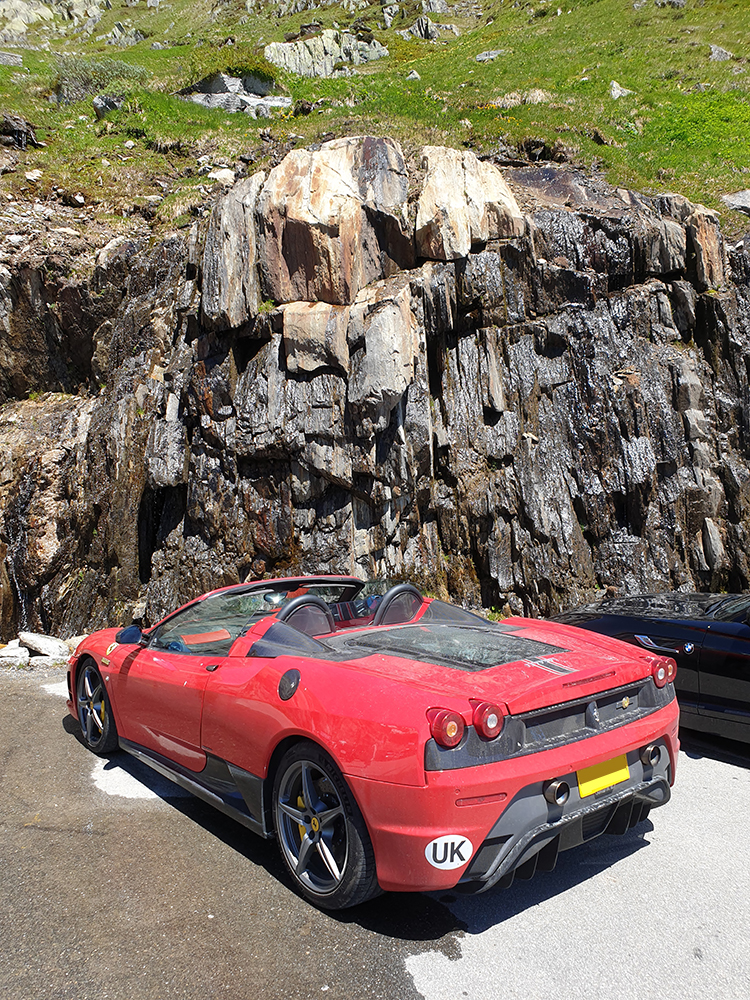
Some general shots of the car. By this point the car was quite filthy from all of the melt water and dust.

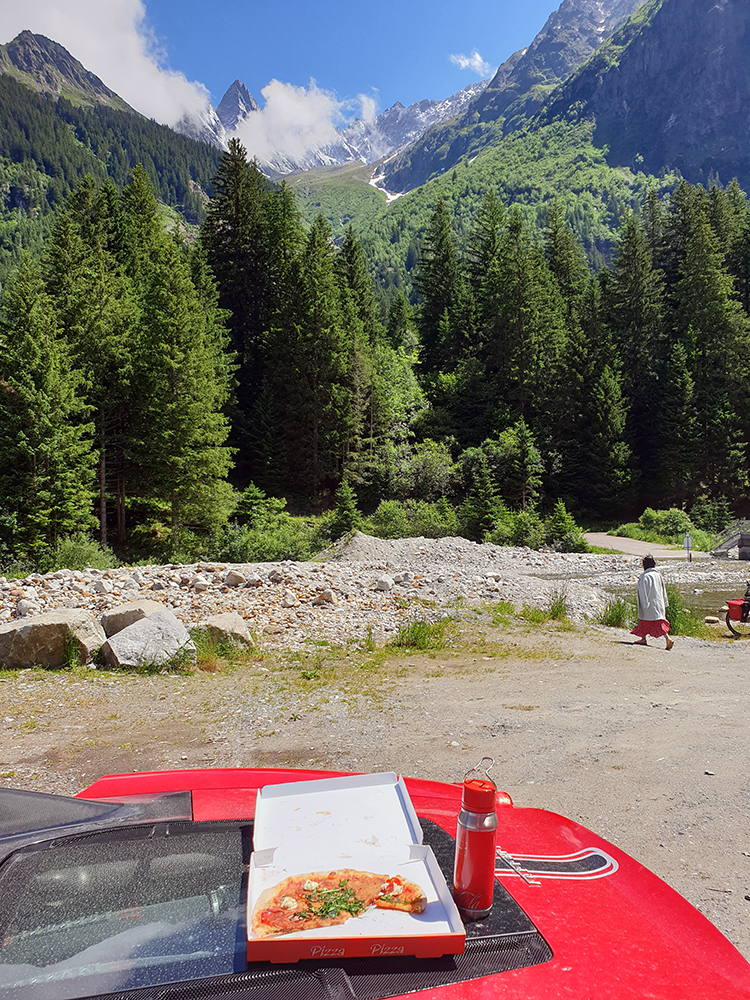
Beer O'Clock. One of my favourite aspects of a road trip is mooching around at our own pace; I don't like to plan in lots of activities (keep that for work!). It's nice just to explore and see life in general being lived in a different place.

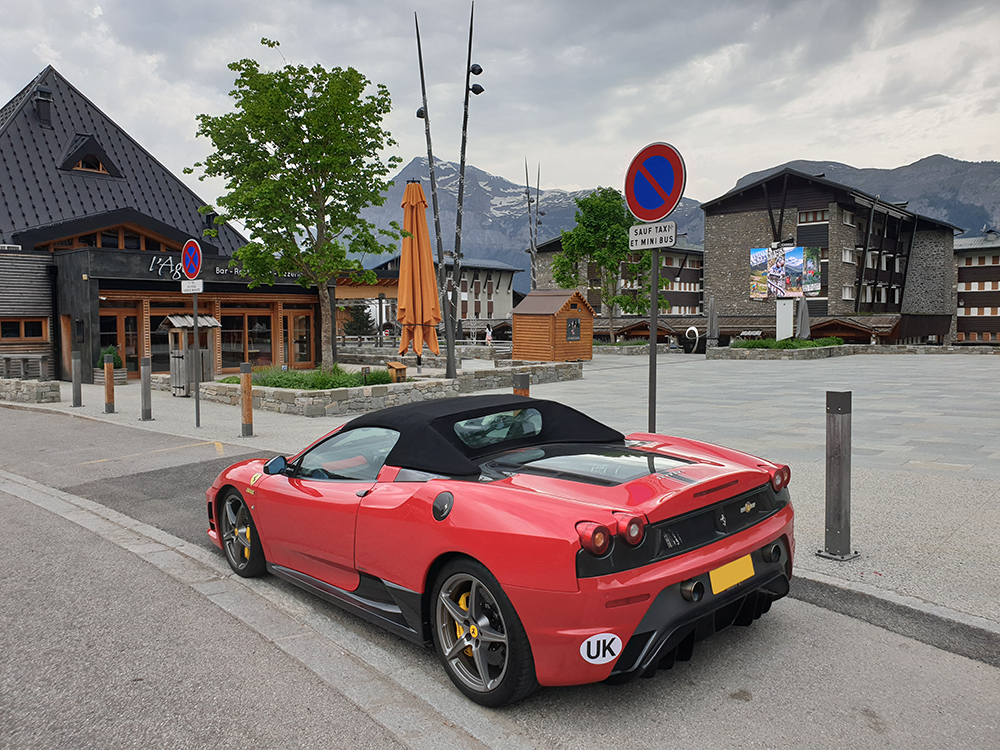
I can't remember if I updated in a previous post, but I prefer to not use the mesh grille in the rear bumper as I like the two air vents either side of the diffuser which are normally hidden. I repainted this area in grey to match the wheels, and I'm happy with how it looks - in factory trim it all looks a bit too black.
Next stop, Italy...
We arrived at the hotel later in the evening as I'd been distracted by a few nice back roads
The kitchen had closed, but the owner opened it for us and served dinner and a drinks.Excellent.
It was very nice to wake up to clear skies and a nice view.
I normally plan these trips outside of peak time and school holidays, but even so we were extremely lucky with the traffic situation; the Swiss passes are well-known in motoring circles so there's always a bit of traffic, but I had several of the passes completely to myself. I had to be a bit careful to not shake my wife around too much, but I turned round to drive some of them more than once. Despite not going anywhere near 10/10ths these were some of my most memorable drives to date.
Out of season ski resorts always have a '28 Days Later' feel about them.
Some of the scenery and a view looking down at one of the passes.
A fantastic piece of civic architecture.
We came across a group of UK registered Porsche's driving through the passes.
Some general shots of the car. By this point the car was quite filthy from all of the melt water and dust.
Beer O'Clock. One of my favourite aspects of a road trip is mooching around at our own pace; I don't like to plan in lots of activities (keep that for work!). It's nice just to explore and see life in general being lived in a different place.
I can't remember if I updated in a previous post, but I prefer to not use the mesh grille in the rear bumper as I like the two air vents either side of the diffuser which are normally hidden. I repainted this area in grey to match the wheels, and I'm happy with how it looks - in factory trim it all looks a bit too black.
Next stop, Italy...