What's new
Club Scuderia

This is a sample guest message. Register a free account today to become a member! Once signed in, you'll be able to participate on this site by adding your own topics and posts, as well as connect with other members through your own private inbox!

  • Please take a minute to read this thread about our recent server issues and forum platform Switch

348 Door Trim removal

PAUL V

Active member
Can any of you do me a favour

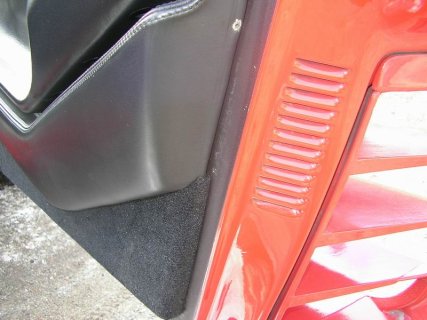
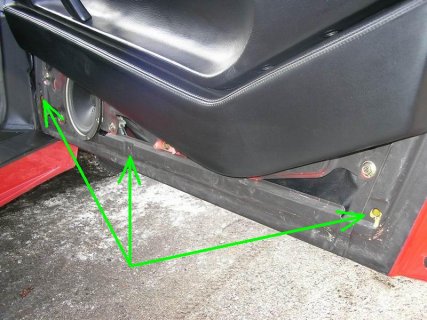
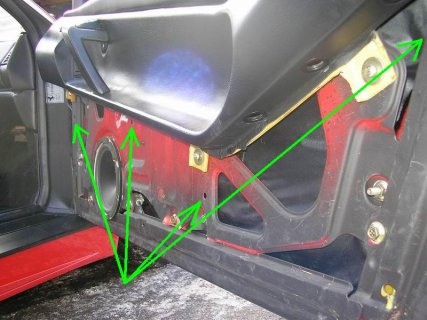
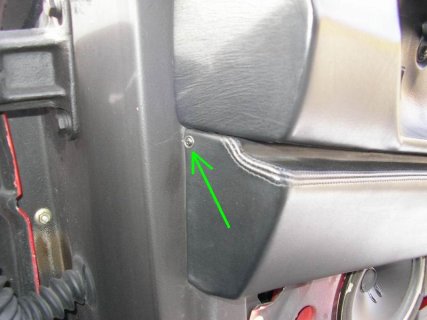
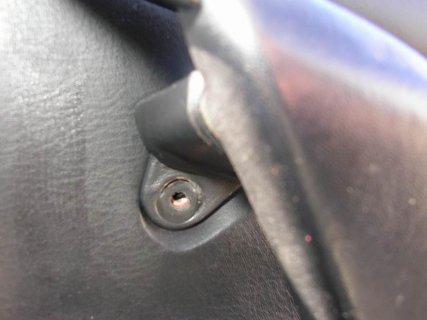
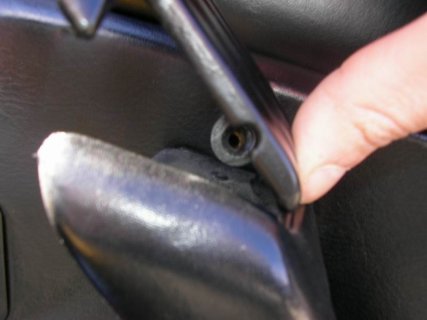
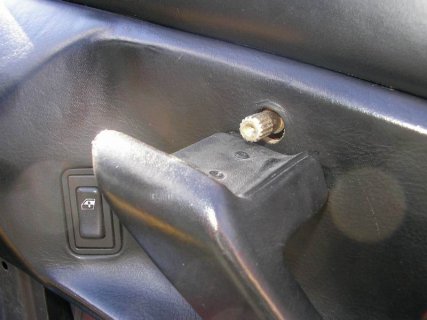
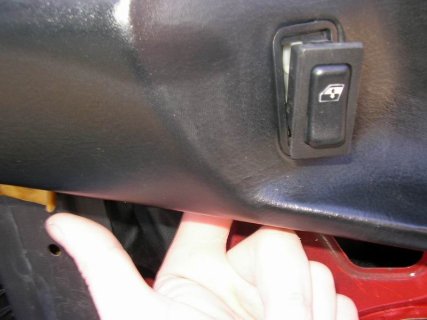
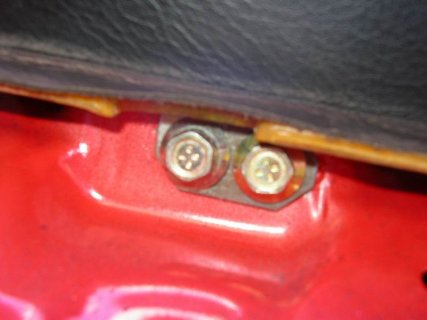
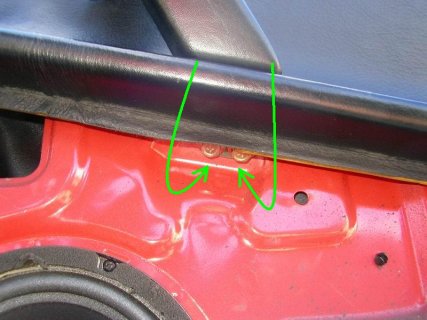
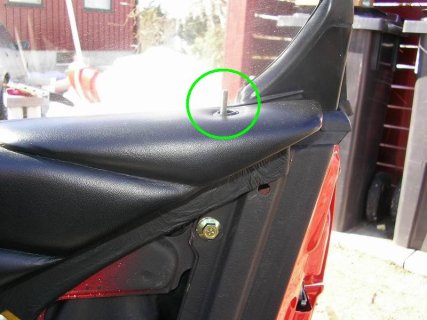
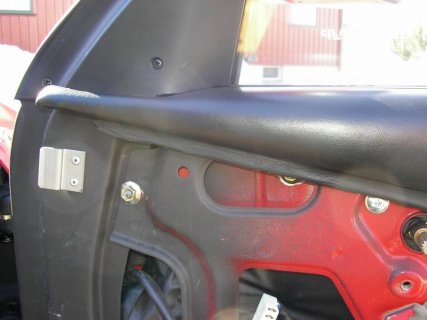
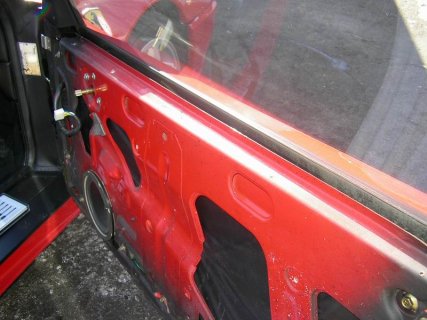
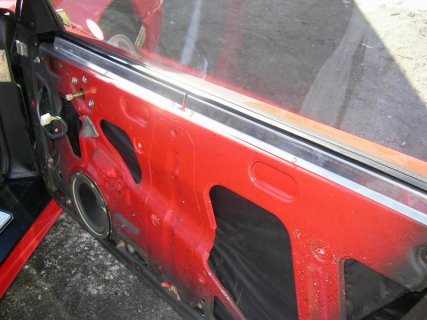
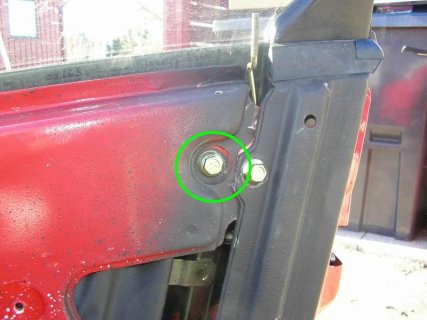
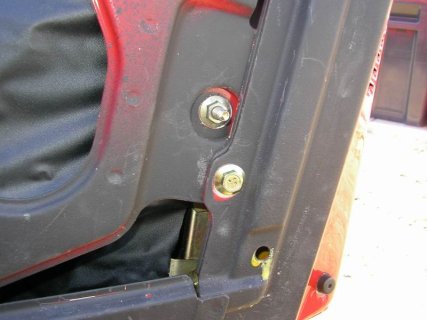
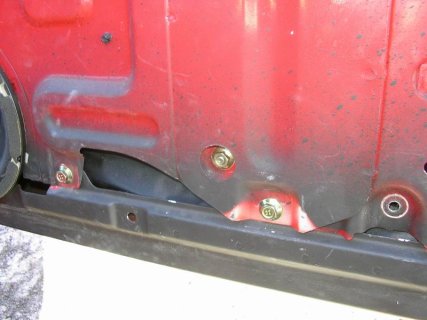
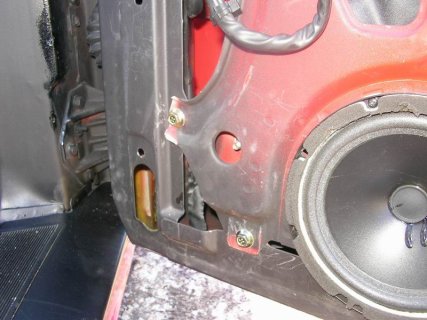
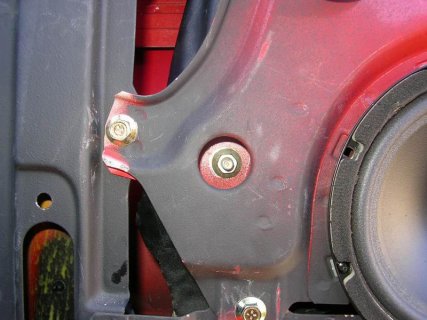
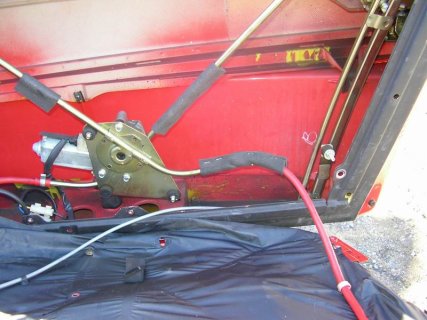
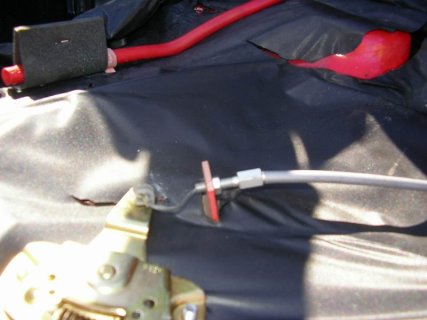
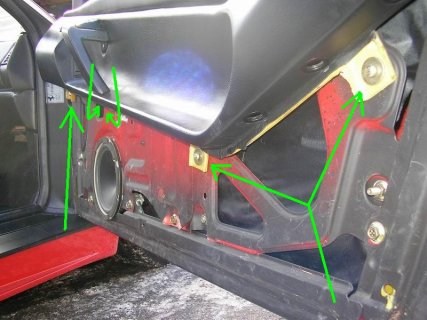
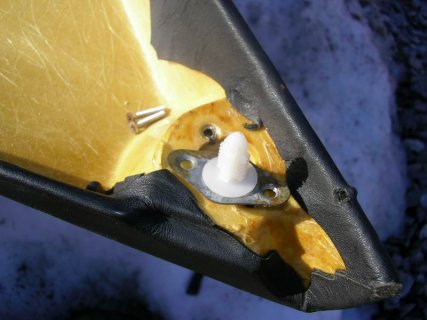
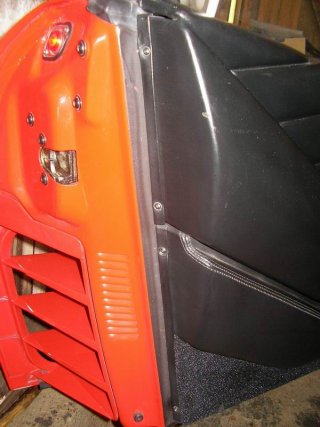
I have taken the door cards off my 348TB and am a little confused how they are fixed, I know there are plastic clips and various screws that hold some of them on etc. The area where I have a problem it the end of the door (opposite to the door hinge) are there any screws in that end??

The parts book lists 2 alloy strips called door upper moulding and door lower moulding but I cannot for the life of me understand how this attaches to the door. Any photos of the door end may clear this up.
 
How to get inside the door on a 348!

I've had some problems with opening the passenger door from the inside on my car, so I decided to take a closer look at the problem today.

And I thought it would be a good idea of taking some pics during the process, in case some of you might find it interesting :thumbsup:
This is how I did it, step-by-step :thumbsup:

The first thing I did was to remove the two strips from the outter part of the door.
The door on the 348 has 4 different "sections/panels" - and I started by gently pulling off the lower section - the fabric.
This section was held in place by 3 clips and no screws.

(PS: The clips might break, so I recommend that you have some spare clips)
 

Attachments

  • 01.jpg
    01.jpg
    79.8 KB · Views: 478
  • 02.jpg
    02.jpg
    102.8 KB · Views: 470
STEP 2.

The next section was held in place by 4 clips and 1 screw...
 

Attachments

  • 04.jpg
    04.jpg
    85.6 KB · Views: 497
  • 03.jpg
    03.jpg
    59.3 KB · Views: 468
STEP 3

The door handle section was held by 3 main screws and 2 from underneath the door handle.

Firstly unscrew the door handle and the small screw which holds the opener...
Stick your finger under the panel and simply push out the window-lift button, and disconnect it from its socket.
 

Attachments

  • 05.jpg
    05.jpg
    51.9 KB · Views: 459
  • 06.jpg
    06.jpg
    45.9 KB · Views: 467
  • 07.jpg
    07.jpg
    72.1 KB · Views: 456
  • 08.jpg
    08.jpg
    58.5 KB · Views: 464
STEP 4

Unscrew the 3 main (big) screws on this section, note that there are also 2 screws up under the door handle.

So in total here, you need to unscrew 5 screws and no clips.
 

Attachments

  • 09.jpg
    09.jpg
    48.5 KB · Views: 463
  • 10.jpg
    10.jpg
    80.6 KB · Views: 458
STEP 5

The top section is not connected at all.
Just pull it gently off, remembering to remove the door knob first.
 

Attachments

  • 11.jpg
    11.jpg
    78.6 KB · Views: 462
  • 12.jpg
    12.jpg
    60.1 KB · Views: 460
STEP 6

Remove the 2 aluminium strips and the window strip- not a MUST, but its easier to work when its removed.

Undo the 6 small screws and the window strip can be removed.
 

Attachments

  • 14.jpg
    14.jpg
    86.8 KB · Views: 463
  • 13.jpg
    13.jpg
    86.9 KB · Views: 446
STEP 7

Now, the tough part...
Unscrew ALL the big screws from the inner door panel (10mm)

TAKE NOTE OF THE 2 SCREWS CIRCLED IN GREEN
 

Attachments

  • 15.jpg
    15.jpg
    72.3 KB · Views: 434
  • 16.jpg
    16.jpg
    69.6 KB · Views: 429
  • 17.jpg
    17.jpg
    65.5 KB · Views: 424
  • 18.jpg
    18.jpg
    86.9 KB · Views: 427
  • 19.jpg
    19.jpg
    65.2 KB · Views: 427
  • 20.jpg
    20.jpg
    87.4 KB · Views: 418
STEP 8

The inner panel is now loose, so gently lay it down on something flat, make sure it dosent hang loose under it's own weight or it may strain the wiring.:shocked:
 

Attachments

  • 21.jpg
    21.jpg
    73 KB · Views: 430
  • 22.jpg
    22.jpg
    85.9 KB · Views: 423
  • 23.jpg
    23.jpg
    57.8 KB · Views: 421
Remember those 2 screws circled in green?

When you're putting this back together, you might struggle matching the holes with the screws. Those 2 green circled screws are actually held by the window-lifter - so you might need to lift the window with your hand in order to fit the screws.

Also remember to have extras clips handy, in order to replace any old ones which may have become damaged!

I'll continue this thread as soon as I've got a replacement wire!:thumbsup: :thumbsup:
 
The first thing I did was to remove the two lists from the outter part of the door.

I think they are 2 bits of Alloy painted black? I have done what you have done removed all the door parts but my Lists as you call them i think are wrong or not the right shape any more so a photo of yours would help.

Yes i could not work out the 2 holes i have had mine recoverd so they are not there any more.
 
Paul

Here you have a better look of the strips
They CAN be a PITA to reinstall but.....

Hope this helps - if I'm off the mark, please let me know :laugh:
 

Attachments

  • Resize of Bilde.jpg
    Resize of Bilde.jpg
    72.2 KB · Views: 317
Top