irarref
Active member
As some of you know I recently bought "348 KYD" from the Isle of Man so I thought I thought I'd show you what I've been up to.
http://www.clubscuderia.co.uk/forum/showthread.php?45221-Anyone-know-348-KYD&highlight=kyd
First thing I like to do when I get a car is to give it a thorough clean so I can get to know it and find out all the little niggles that need fixing.
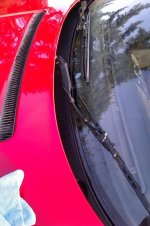
After giving the car a regular wash I wanted to get the car scrupulously clean so using a product called Iron-X that removes bonded contraminants I covered the car


After a few minutes any iron based contaminants start turning purple - you can just about make them out in this pic

Just to jolly things along I used a small brush to agitate the product especially around the badges and the grill louvres


Once its done its work just rinse off with water and you should have a pretty clean car

http://www.clubscuderia.co.uk/forum/showthread.php?45221-Anyone-know-348-KYD&highlight=kyd
First thing I like to do when I get a car is to give it a thorough clean so I can get to know it and find out all the little niggles that need fixing.
After giving the car a regular wash I wanted to get the car scrupulously clean so using a product called Iron-X that removes bonded contraminants I covered the car
After a few minutes any iron based contaminants start turning purple - you can just about make them out in this pic
Just to jolly things along I used a small brush to agitate the product especially around the badges and the grill louvres
Once its done its work just rinse off with water and you should have a pretty clean car
Last edited:
![ClayBar001.jpg[ATTACH]](http://i68.photobucket.com/albums/i2/jeffreyduckworth/Ferrari/348/Detailing/Clay%20Bar/ClayBar001.jpg[ATTACH])
![ClayBar002.jpg[ATTACH]](http://i68.photobucket.com/albums/i2/jeffreyduckworth/Ferrari/348/Detailing/Clay%20Bar/ClayBar002.jpg[ATTACH])
![ClayBar003.jpg[ATTACH]](http://i68.photobucket.com/albums/i2/jeffreyduckworth/Ferrari/348/Detailing/Clay%20Bar/ClayBar003.jpg[ATTACH])
![ClayBar004.jpg[ATTACH]](http://i68.photobucket.com/albums/i2/jeffreyduckworth/Ferrari/348/Detailing/Clay%20Bar/ClayBar004.jpg[ATTACH])
![ClayBar005.jpg[ATTACH]](http://i68.photobucket.com/albums/i2/jeffreyduckworth/Ferrari/348/Detailing/Clay%20Bar/ClayBar005.jpg[ATTACH])
![ClayBar006.jpg[ATTACH]](http://i68.photobucket.com/albums/i2/jeffreyduckworth/Ferrari/348/Detailing/Clay%20Bar/ClayBar006.jpg[ATTACH])


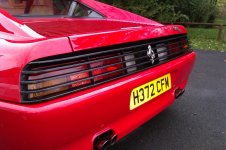
") Just got to sort the lights out and touch up all the stone chips on the bumper
Just got to sort the lights out and touch up all the stone chips on the bumper