What's new
Club Scuderia

This is a sample guest message. Register a free account today to become a member! Once signed in, you'll be able to participate on this site by adding your own topics and posts, as well as connect with other members through your own private inbox!

  • Please take a minute to read this thread about our recent server issues and forum platform Switch

Ferrari 348 engine bay and rear end restoration.

DSCF8382.jpgDSCF8397.jpgDSCF8379.jpgDSCF8380.jpg

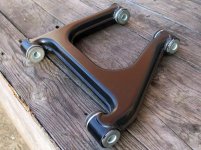
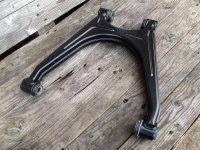
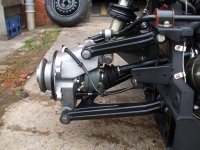
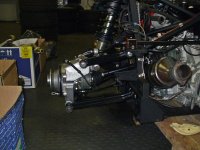
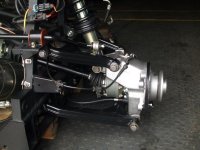
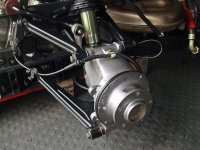
Top and bottom rear suspension arms have been blasted ,powdercoated and rebushed. Changing the bushes is not a job to be taken lightly. I would
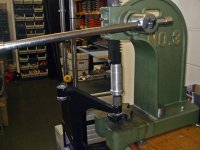
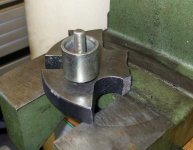
recommend finding someone with a hydraulic press to get them out and back in again. I managed to do 12 out of 16 using the press above and a fly press. I made some tooling to do this. The item above has a bolt welded in dead centre which kept it all in line. This fits underneath the bush. Its not
in the photo of the press but im sure you will get the idea. The outer lower arm bushes were very stiff and I had to take the arms to an engineer I
know to get them all the way in. Easy with the right kit.
 
Hi Trevor, I used genuine 355 bushes. Meant to be 20% stiffer and all fit perfectly. I dont want to get to far away from standard. I dont like using
makes like Proflex on my own cars. They can make for a harsh ride. Its a personal thing and I have fitted lots of them to other peoples road cars
with great success. They need periodic attention in my experience. Re-lubing I mean by that. Good product though used by many.
 
DSCF8394.jpgDSCF8395.jpg

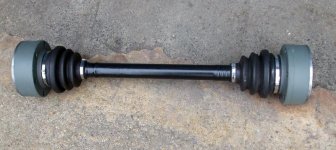
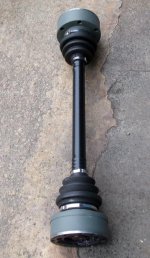
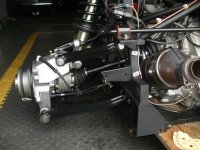
Driveshafts rebuilt. Powdercoated shafts. Joints have been stripped and reassembled then painted with a metal protection paint similar to standard.
A friend managed to get me some from someone he knows. It came in an unmarked tin so no make for this. Looks like Ferrari brush this on but
these were sprayed as I only had a small amount. I will try to find a make for the paint at some point. Maybe the military use this as I think the
supplier is in the army.
 
DSCF8443.jpg

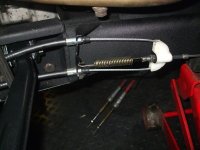
Handbrake linkage all done. I used new cables right through. The handbrake feel superb now. Remember to adjust the hub adjuster on the shoes
first before taking up the slack in the cables.
 
DSCF8326.jpg

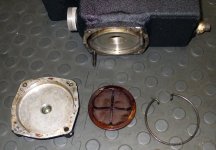
For those who may not know, this is whats in the bottom of the dry sump tank. May be difficult to remove this due to the steel retaining studs being seized to the cover. Try to extract the stud first if you have problems. Forcing it may crack the hole flange. This is how mine looked before cleaning. Nothing evil in there. I dont think these would be removed that often to be honest.
 
DSCF8241.jpgDSCF8297.jpgDSCF8298.jpgDSCF8300.jpgDSCF8303.jpg

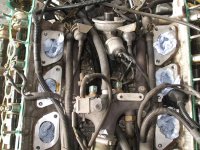
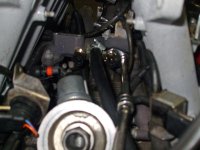
Picture 1 is of the top of the engine block with inlet manifold removed. In the centre between the two blue Temp sensors is a bleed off hose which
goes to the coolant header tank. As you can see the hose is bulging and the fitted clip has been tightened far to much. This is an obvious point of
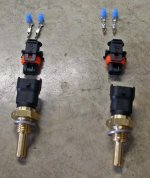
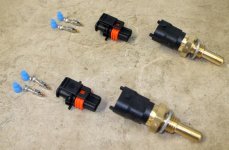
failure in future in my opinion so I have replaced the hose and clip. Also I have replaced the temp sensors with the new type of Bosch units.
Also the old connectors have been removed and new ones fitted. They have gold plated pins which has got to be an improvement. You can access
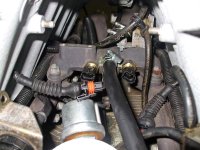
these with the manifold still in place as shown. If you cant fit a socket over the new sensors use a 19mm crowsfoot spanner to tighten. As shown.
The other sensor you can see in picture 1 is for the temp gauge on the dashboard. Its made by Veglia but oddly no number found on it. Would
recommend changing this if you had the manifold off as it looks an impossible job otherwise. All this work is to prevent, rather than cure any faults.
I will post the part numbers for the sensors when I get over to the workshop next.
 
DSCF8308.jpg

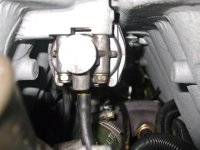
Worth checking this vacuum unit. Its under the front of the plenum and controls the air compensator valve/butterfly between the two chambers.
You can use a vacuum pump if you have one or short of that a piece of vac tube and suck through it. If you have no resistance to the
sucking you have probably got a hole in the diaphragm. From what I can gather the the compensator valve works between 3250 to 5500 rpm
and adds torque to the midrange so handy to have working properly. Please correct me if Im wrong about this. Make sure the associated linkages
are nice and free too. I used a light white grease on reassembly. Easy with engine out or manifold off. Very awkward with manifold on engine in car..
 
Hi Paul, Thanks for the tip. The pipe in question looked in good shape and cleaned up fine. Did not see a reason to replace it this time round. I know
what you mean though and have had to replace similar items on other vehicles over the years. Thanks again. Why have you pulled your engine to
pieces.? Did something let loose?

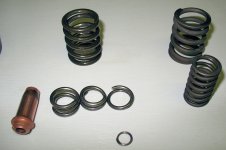
The engine was running OK but i was doing a restoration on the car (Similar to you) and found 1 of the cylinders low on comp. I then stripped it down to find one the inner valve springs had broken, so i changed all 32 of them along with the valve guides.
 
Do you think the spring was the cause of the low compression? Normally its an exhaust valve/seat or piston problem. Was the break on the low
cylinder? I take it it was.
Just for interest sake.
Thanks.
 
Yes it was the valve on that cylinder, here is what was left of the spring and the valve guide (on the left) new springs on the right.

HEAD-1.jpg
 
DSCF8448.jpgDSCF8445.jpg

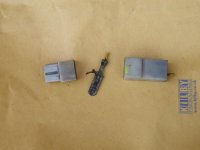
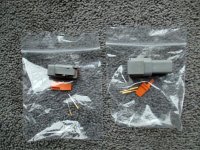
Ive had an intermittent problem with the petrol cap not opening from the switch. I took a look at the connector under the wing and this is what I
found in pic 1. Not great as you will agree so I replaced it with a new two pin Bosch plug. Fully sealed against moisture unlike the nasty old Ferrari/
Fiat plug. Lets see what happens and I will let you know. Im hopeful.
 
Yes it was the valve on that cylinder, here is what was left of the spring and the valve guide (on the left) new springs on the right.

View attachment 131719

Wow. It really did break up. Ive seen a few springs like this over the years but normally on race or rally cars. It does happen on road cars but its
not that common a fault. I built Subaru STI engines for years and saw quite a few then but normally just broke in two. Hard revving can take its toll
over time.
 
The engine was running OK but i was doing a restoration on the car (Similar to you) and found 1 of the cylinders low on comp. I then stripped it down to find one the inner valve springs had broken, so i changed all 32 of them along with the valve guides.

Hi Paul, Again for interest, how low was the bad compression in relation to the others. Thanks.
 
Hi Paul, Again for interest, how low was the bad compression in relation to the others. Thanks.

You know i can not remember as this was back in 2009 but reading my thread on F-chat it was down to 50 PSI i think the others were 150 ish ? what was confusing at the time was it would go up to say 90psi then back down to 50, but a bore scope in there and all looked fine.

You may want to look at the thread on F-chat, i started work on mine in 2006 and only got it on the road this year !

Here is the thread http://www.ferrarichat.com/forum/348-355/99531-work-so-far-my-348-a.html
 
Hmm. I would have thought you would have noticed a missfire as low as that. Interesting. I will check out your link. Im pretty sure Ive been there
for something.
 
DSCF8450.jpg

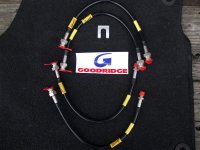
Im not one for too many mods but I do rate Goodridge hoses. These are the Phantom range. Still look fairy stock due to the black coating and have stainless steel ends which means they will always look decent. Usually give a more positive brake pedal feel too. Dot 5.1 brake fluid used for bleed.
New retaining clips fitted.
 
Top