What's new
Club Scuderia

This is a sample guest message. Register a free account today to become a member! Once signed in, you'll be able to participate on this site by adding your own topics and posts, as well as connect with other members through your own private inbox!

  • Please take a minute to read this thread about our recent server issues and forum platform Switch

Another 348 Rear End Resto!

Chances are they use the same suppliers for the powder as both companies are having problems getting the process
right. Its to hit and miss for them to be bothered if they are busy. Mine look ok as I said before but I think the effort
to get there wore him out. They had a lot on at the time. Ive no idea what the colour code is. Dave at Redditch may
help you there. I don't like the idea of a smooth,shiny finish on the plenum or intake pipes. Best avoided.

I know RSB have trouble with the silver wrinkle and I am aware of how they tried to get the right finish for Paul.

Just another option to consider is to do the plenum in a colour where the texture is correct in powder then wet paint with engine silver.

I did that with my Mondial t a few years ago. The wrinkle looked good in black then coated it straight after the powder with a coat of engine silver. I know from owners 5 years later that it still looked good. Wet painting fresh powder seems to work OK.
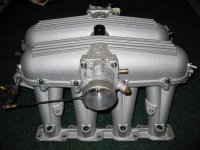
IMG_0948 (Large).jpg
 
Hi Terry. I actually found your thread from a few years ago when you did that and was going to PM you. My wrinkle finish on the plenum / manifold is actually quite good so I might have a crack at this to start with.

Was it the enamel silver paint you used?
 
Hi Terry. I actually found your thread from a few years ago when you did that and was going to PM you. My wrinkle finish on the plenum / manifold is actually quite good so I might have a crack at this to start with.

Was it the enamel silver paint you used?

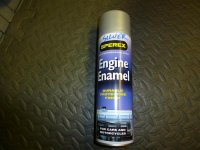
Hi Graham, this is what I used:

P1010104 (Large).jpg

Simoniz has taken over Sperex so it is now available under the new name, the picture on the can is the same.

I found the main advantage of painting over fresh powder was that no preparation was required as it was a clean finish and base on which to overpaint.
 
Thanks Terry, Ive given them a Gunk bath and a gentle power wash like I did for my cam covers so all looking nice and clean ready for painting. I'll give it a go :thumbsup:
 
Would someone just be able to check this for me. Excuse the simplistic sketch, but I just want to make sure Ive got all the vacuum hoses all connected back in the correct way. I took notes at the time but you know what its like when you start questioning yourself!

Ive excluded all wiring, the lines are just the vacuum pipes

View attachment HTS CC006.pdf
 
Would someone just be able to check this for me. Excuse the simplistic sketch, but I just want to make sure Ive got all the vacuum hoses all connected back in the correct way. I took notes at the time but you know what its like when you start questioning yourself!

Ive excluded all wiring, the lines are just the vacuum pipes

View attachment 138823

Am away from my car right now, but I seem to remember (could be wrong - it happens) but the vac pipe arrangement is different if you have Cats or not.

(its a while ago, I saw some de-cat pipes on ebay, and was just looking at the diagrams for what , if anything, needed changing if I got them, and I <think> some pipework was different - but as I didnt buy them in the end, seller withdrew, I didnt complete my research)

But might help if you confirmed Cats or not.
 
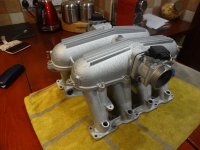
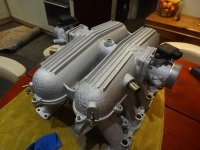
Well they didn't come up too bad after all. This is only a 'mock-up' as Im waiting for all the gaskets etc, but actually quite pleased with the results along with my cam covers :grin:.

DSC07388.jpg

DSC07389.jpg
 
Next stage:

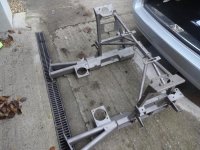
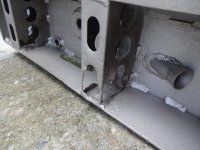
Got my sub-frame back from blasting as I knew I wanted to do some repairs before coating.

I was thinking of maybe instead of duplicating the holed stiffeners, cutting these out and slotting in a 3-4mm solid plate stiffener, 2 at each position. This would also prevent dirt, debris moisture being retained which has caused this to happen.

DSC07445.jpg

DSC07446.jpg
 
Took it down to a fabricator earlier and they are going to use a 2mm plate cut with water jets to the exact profile. Ive also asked them to a drill hole through the base at each position for drainage. Don't think Im going to get it back before xmas though! :thumbsdow

Still got all my engine bay and suspension to sort though so I'll crack on with that.
 
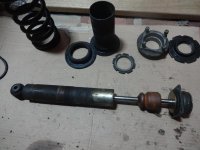
Suspension stripped out, no real issues however Im not sure whether I can get my shocks refurbished or whether a new pair would be required. I like the ride as it is so would only go for standard shocks but any ideas or suggestions for refurbing or replacements gratefully received.

DSC07451.jpg
 
Bilstein Leicestershire apparently refurb them. Another option is to call emblem sports in poole. They use a motorsport specialist so may be able to assist.
Others will be along to give options. Looking at them i dont see why they cant be done...no different to others of that age.
 
I struggled with the 2nd one getting the bottom retaining nut off so Ive just sent both complete units off to Bilstein for refurbishment. Will be interesting to see how they come back
 
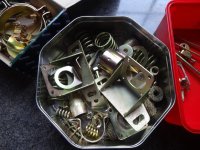
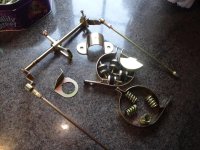
Things starting to come back now rather than sending them away. Pleased with all my plated goods, just wish Id spent a bit more time preparing the exhaust mounts.

DSC07506.jpg

DSC07507.jpg
 
Top