Club Scuderia
-
Please take a minute to read this thread about our recent server issues and forum platform Switch
You are using an out of date browser. It may not display this or other websites correctly.
You should upgrade or use an alternative browser.
You should upgrade or use an alternative browser.
348 DIY "Restoration"
- Thread starter irarref
- Start date
milkshaker0007
Active member
So sorry to hear this Jeff, I wish you all the best, someone will have a great car for sure
irarref
Active member
Cheers guys - the sentiments are appreciated 
For all you TS/GTS guys I've just listed my foldable targa softtop so just PM me with any interest.
For all you TS/GTS guys I've just listed my foldable targa softtop so just PM me with any interest.
Ferrari 348/355 TS/GTS Foldable Targa Soft Top for sale
I have an uber rare folding soft top for sale which is suitable for either a 348 or 355. Ideal for the taller driver and allows you to put the seat fully back. Stored on the parcel shelf when not in use. As I understand it this is the NLA factory top part# 63380800 NB. I have added some...
clubscuderia.co.uk
irarref
Active member
Had a very busy bank holiday yesterday - started around 10am and it took me till about 5pm just to get the bumper and front wing off. I know all about the "hidden welds" on a front wing and now have a new respect of the strength of mastic/seem filler or whatever it is!
Hoping to get the driver's side wing back on and the passenger side off today - assuming all goes well! I'll post the full story when I've done as have taken a ton of photos - took a lot longer than expected :-(
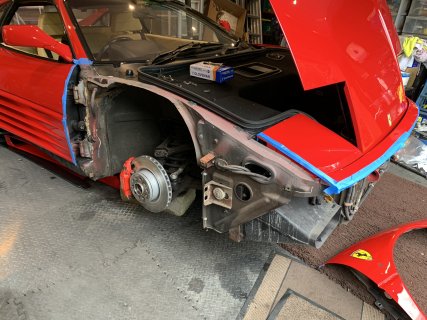
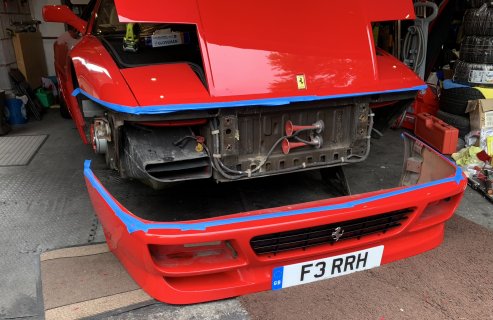
Hoping to get the driver's side wing back on and the passenger side off today - assuming all goes well! I'll post the full story when I've done as have taken a ton of photos - took a lot longer than expected :-(


MalcH
Active member
Sorry to hear about your health, job and selling the car. We never know what is in store and the older I get (60 next month FFS) the more I get concerned. Had a Ferrari since September 2004 and although I had a momentary lapse of reason post covid I have fortunately kept hold. I know it can't be easy for many reasons. Wishing you better health, a new job and perhaps another Ferrari soon.
irarref
Active member
Cheers guys - much appreciated. Really struggled with fitting the front wing so gave up and took it to my friendly bodyshop this afternoon. I just couldnt get it to fit with an even gap btween the door and strake panel. He's just sent me a photo of the initial fit and all is looking good, Got a bit carried away whilst I was there and going to get a few other little bits and pieces done atthe same time  First time in 12 years I've not had a Ferrari in the garage and I don't like it! :-(
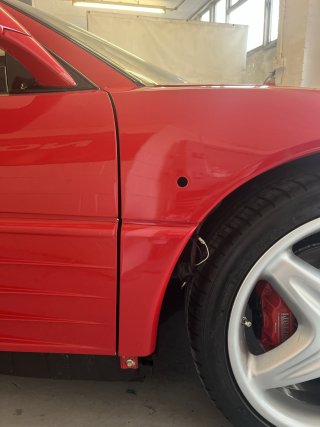

Hi Jeff, I too have watched your thread with great interest. You are a brave, patient man  . I have owned my 348 for about 20 years and have often thought of selling as I don't use it much, but cant seem to do it.
I see you are based in the north west, me too.
What body shop did you use as they look to have done a great job. Mine will need some TLC eventually and it would be good to get a body shop recommendation for when i eventually come to doing it
Cheers
I see you are based in the north west, me too.
What body shop did you use as they look to have done a great job. Mine will need some TLC eventually and it would be good to get a body shop recommendation for when i eventually come to doing it
Cheers
irarref
Active member
Here you go:
Jon
B D Autobody
Unit B2a
Town Gate Works
Dark Lan
Mawdesley
Ormskirk
L40 2QU
Tel: 01704 821648
Facebook: https://www.facebook.com/bdautobody/?locale=en_GB
Youtube: https://www.youtube.com/@bdautobody/videos
Jon
B D Autobody
Unit B2a
Town Gate Works
Dark Lan
Mawdesley
Ormskirk
L40 2QU
Tel: 01704 821648
Facebook: https://www.facebook.com/bdautobody/?locale=en_GB
Youtube: https://www.youtube.com/@bdautobody/videos
irarref
Active member
Bodyshop texted me before to say I can pick my car up tomorrow 
The front wing is all done and the skirt etc. put back on. I'm also having the stem of my wing mirror repainted as it was starting to bubble. I just need to fit the wing mirror when I get there plus reapply my fender shield when I get it back home.
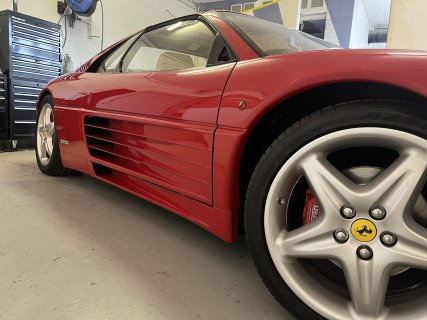
Rot at the bottom of front passenger wing was cut out and the Ferrari repair panel cannibalised to make a repair patch.
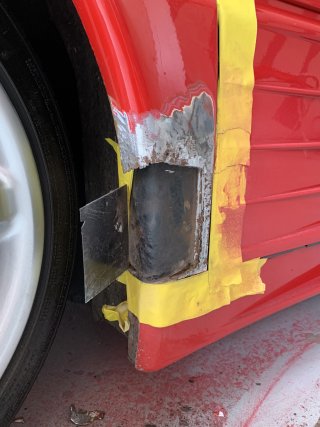
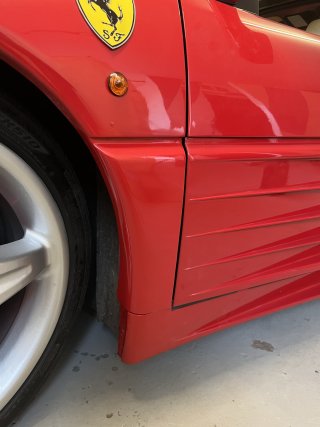
There was a bit of rust just on the edge of the wing near the bumper that has been treated and blown in (sorry forgot before pic).
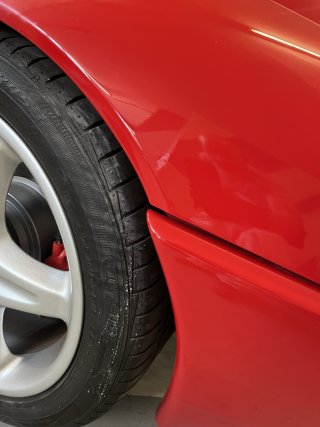
The front wing is all done and the skirt etc. put back on. I'm also having the stem of my wing mirror repainted as it was starting to bubble. I just need to fit the wing mirror when I get there plus reapply my fender shield when I get it back home.

Rot at the bottom of front passenger wing was cut out and the Ferrari repair panel cannibalised to make a repair patch.


There was a bit of rust just on the edge of the wing near the bumper that has been treated and blown in (sorry forgot before pic).

irarref
Active member
As mentioned earlier in the thread just as I was about to embark on a road trip the seat back adjustment broke and after taking the back of the seat off you can see what's wrong here. Despite spending an age undoing the fiddly bolts securing the twisted plate, straightening it, and then rebolting it back it just didnt work very well so in the end I bought a pair of rough seats off eBay for £200 and made a 500-mile round to collect them.
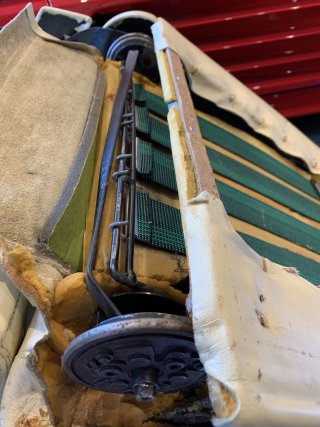
Here's the driver's side seat. The plan is to seperate the seat and the back and transfer the back with the working mechanism onto my seat. Unfortunately I just cant replace the whole seat as the seat part has ripped leather.
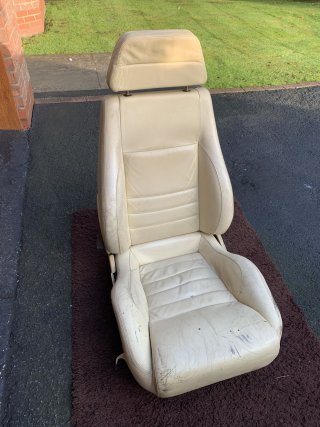
The bolts securing the seat to the metal bracket joined to the back pass through the runners so using an alan key I undid all the bolts I could find - you have to slide the runner about to expose some of the bolt heads that can be accessed through a hole in the runner/
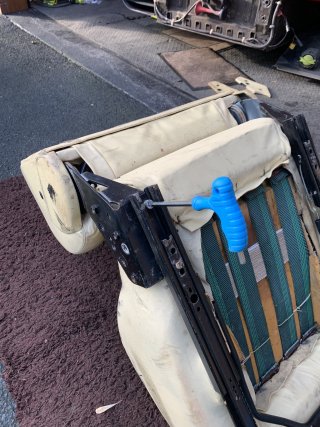
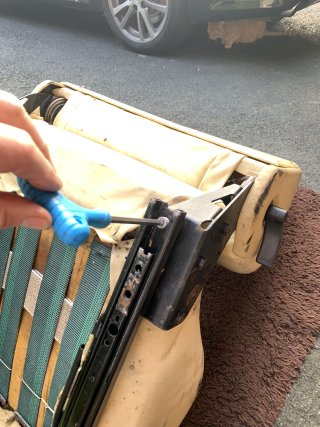
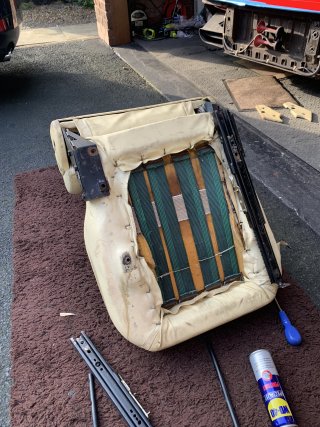
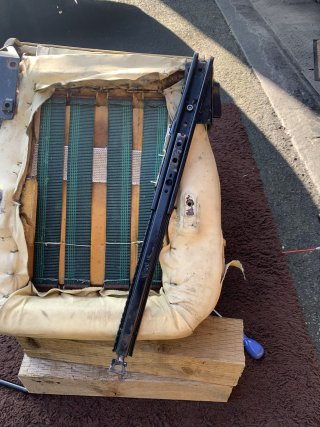
All was going well until one of the bolts rounded and was well and truly stuck.Long story short I had to use an irwin bolt grip to undo it which involved filing off the little tab on the runner so the slider would go further than it should to expose the bolt head. GRRR!!!
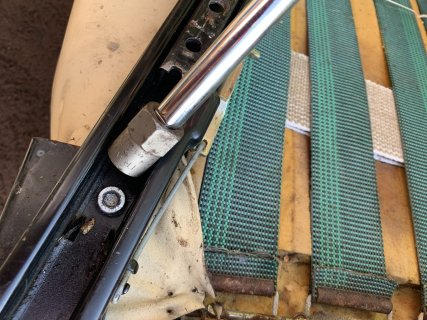
Old seat in 2 pieces - now to repeat the process on my lovely shiny seat - but with broken mechanism :-(
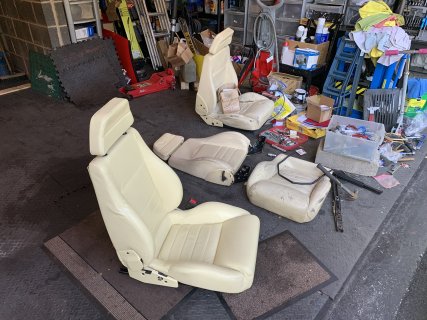

Here's the driver's side seat. The plan is to seperate the seat and the back and transfer the back with the working mechanism onto my seat. Unfortunately I just cant replace the whole seat as the seat part has ripped leather.

The bolts securing the seat to the metal bracket joined to the back pass through the runners so using an alan key I undid all the bolts I could find - you have to slide the runner about to expose some of the bolt heads that can be accessed through a hole in the runner/


All was going well until one of the bolts rounded and was well and truly stuck.Long story short I had to use an irwin bolt grip to undo it which involved filing off the little tab on the runner so the slider would go further than it should to expose the bolt head. GRRR!!!

Old seat in 2 pieces - now to repeat the process on my lovely shiny seat - but with broken mechanism :-(

irarref
Active member
Now its time to separate my existing seat into it's 2 parts.
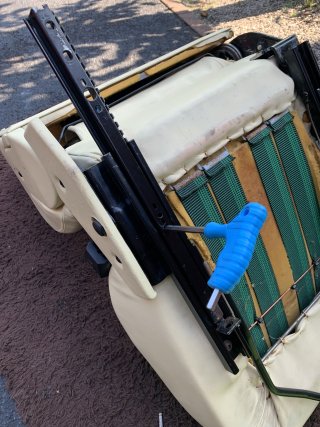
Curiously there were a different amount of bolts on this and a slightly different style too.
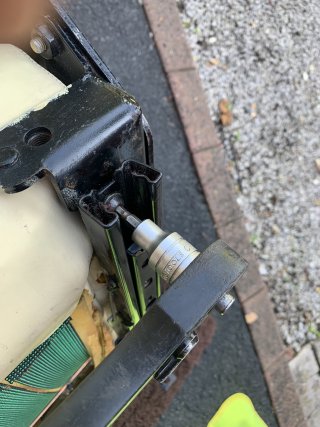
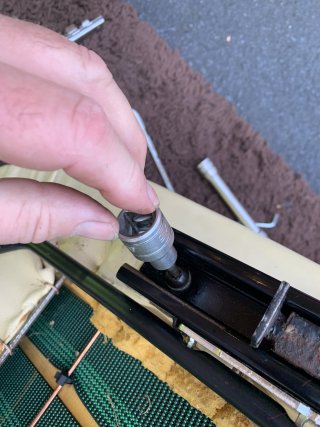
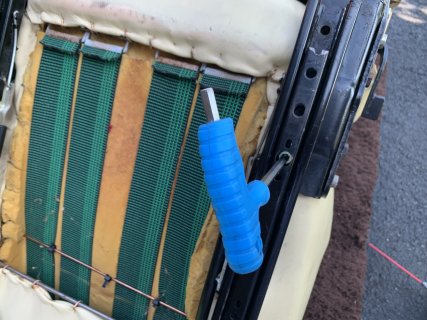
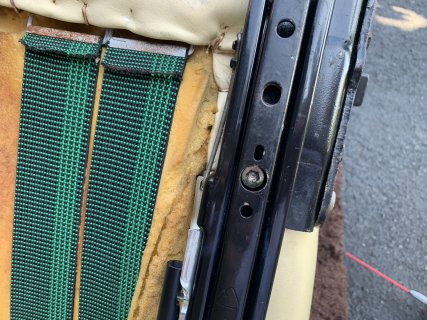
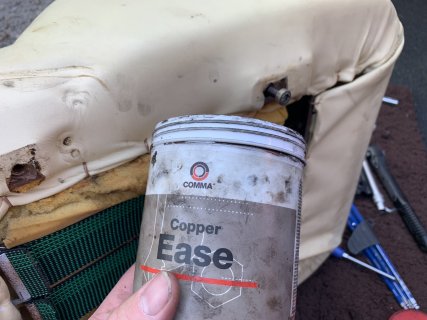
Once they were separated i cleaned out the threads on the bottom of the seat using copper ease and repeatedly screwed the bolts in and out.
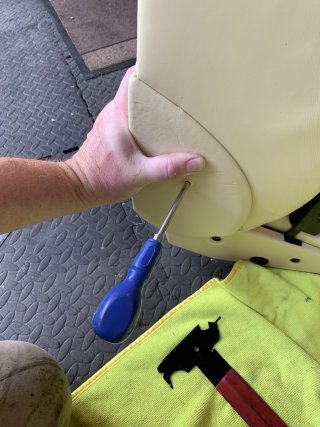
The only fly in the ointment was that the seats I bought had the later style lever for adjusting the recline and you can't just swap the levers over as the panel they go into is a different shape. After removing the lever itself just ease out the plastic lug.
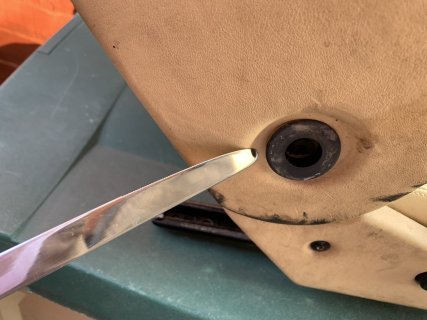
The panel behind can just be tugged away from the seat.
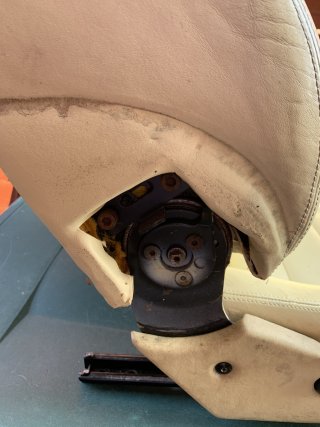
The other side panel is just held on with a plastic lug although one of mine snapped upon removal as it was brittle with age.
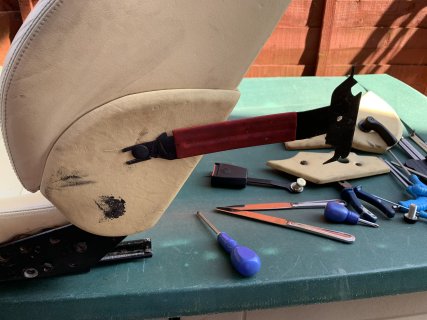
Not the best pic but now I have a fully working reclining seat made up of my original seat base connected to a new style but scruffy seat upright - nearly there!
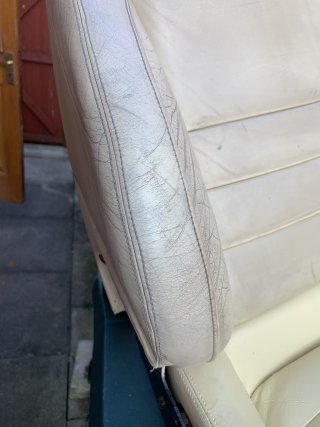

Curiously there were a different amount of bolts on this and a slightly different style too.


Once they were separated i cleaned out the threads on the bottom of the seat using copper ease and repeatedly screwed the bolts in and out.

The only fly in the ointment was that the seats I bought had the later style lever for adjusting the recline and you can't just swap the levers over as the panel they go into is a different shape. After removing the lever itself just ease out the plastic lug.

The panel behind can just be tugged away from the seat.

The other side panel is just held on with a plastic lug although one of mine snapped upon removal as it was brittle with age.

Not the best pic but now I have a fully working reclining seat made up of my original seat base connected to a new style but scruffy seat upright - nearly there!

irarref
Active member
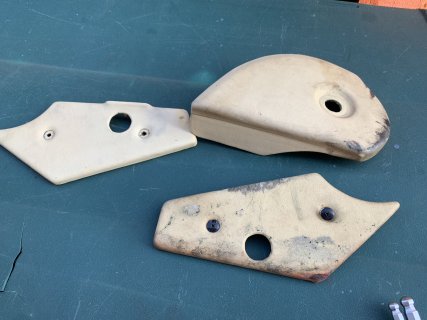
It's actually just the top-right panel that you need to swap over ie the surround round the lever. I just redyed them with my dye so it matches the seat base.
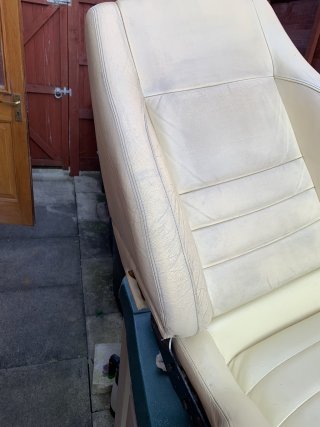
The seat bolsters were rubbed down with wet and dry along with a magic sponge with acetone to remove the worst of the cracks/creases
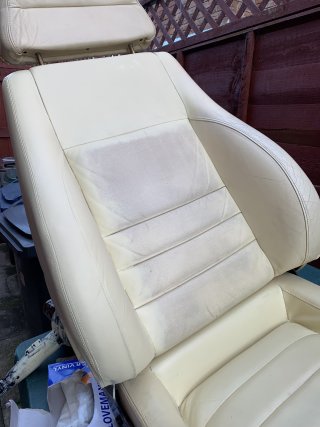
Then a few layers of dye to restore the surface.
Another curiosity/problem is that the later seats dont have a bolt hole to bolt on the shoulder seat belt guide - actually explains why I see so many later cars where the belt goes straight from the reel which I dont like TBH.
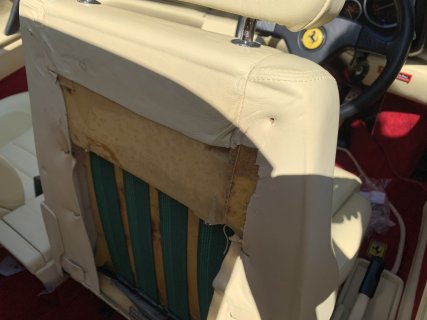
Need to find a solution as to what to do with the belt guide - do I just cut it off and will I have to cut other side to match????!!!
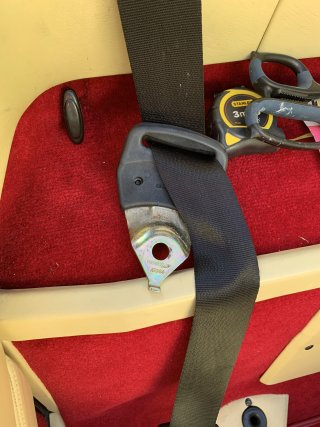
Here's a comparison of the old seat back with a bolt hole for the guide, the matching back with hole and the newer style back with no hole for guide.
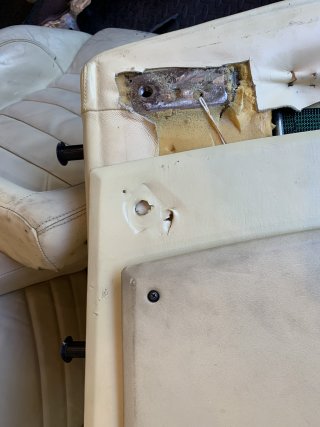
In the end I drilled 2 holes in the back of teh new seat back and threaded a bolt and washer from the inside to the out so I can put the guide on and then put a nut on to secure it (epoxied in place as you won't be able to hold the bolt head once the back is screwed in place.
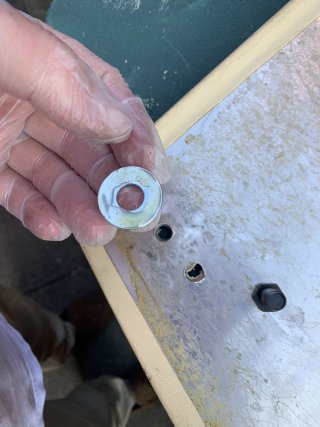
Mock up before I applied the epoxy
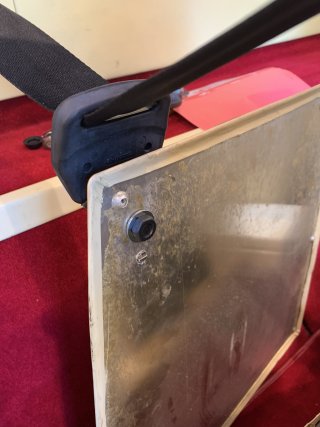
All the screws for the seat back ready for painting
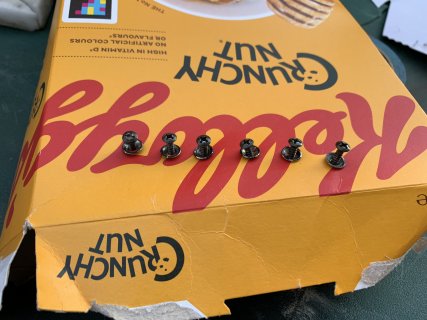
Once the bolt was expoxied in place and the new back dyed it was screwed back on the seat. To make things easier I used toothpicks to locate the holes - very fiddley job.
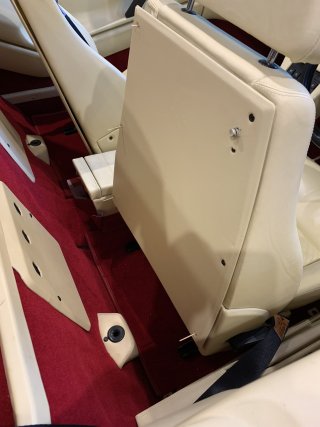
h

The seat bolsters were rubbed down with wet and dry along with a magic sponge with acetone to remove the worst of the cracks/creases

Then a few layers of dye to restore the surface.

Another curiosity/problem is that the later seats dont have a bolt hole to bolt on the shoulder seat belt guide - actually explains why I see so many later cars where the belt goes straight from the reel which I dont like TBH.

Need to find a solution as to what to do with the belt guide - do I just cut it off and will I have to cut other side to match????!!!

Here's a comparison of the old seat back with a bolt hole for the guide, the matching back with hole and the newer style back with no hole for guide.

In the end I drilled 2 holes in the back of teh new seat back and threaded a bolt and washer from the inside to the out so I can put the guide on and then put a nut on to secure it (epoxied in place as you won't be able to hold the bolt head once the back is screwed in place.

Mock up before I applied the epoxy

All the screws for the seat back ready for painting

Once the bolt was expoxied in place and the new back dyed it was screwed back on the seat. To make things easier I used toothpicks to locate the holes - very fiddley job.

h
Last edited:
irarref
Active member
Now to make the passenger seat have the matching recliner lever. I was dreading doing this as it was so much work doing the drivers side then it suddenly dawned on me that I might get away with just swapping the surround panels and the lever 
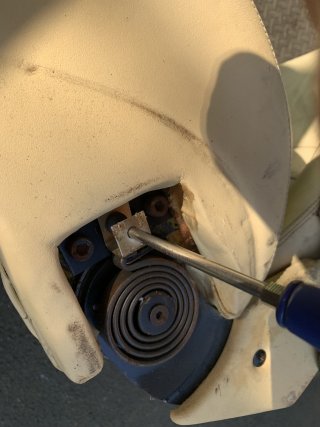
First remove the lever which is held on by a captive alan bolt
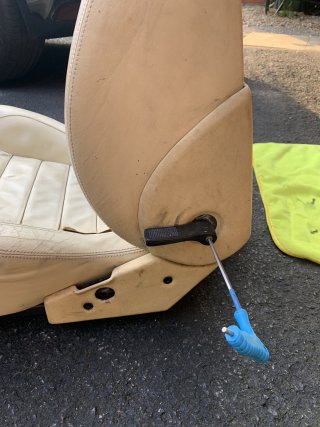
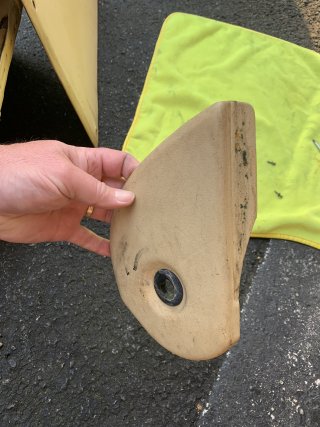
Panel just pulls away then.
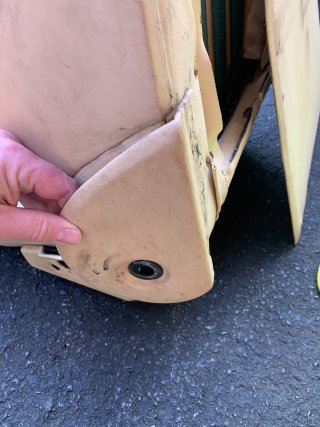
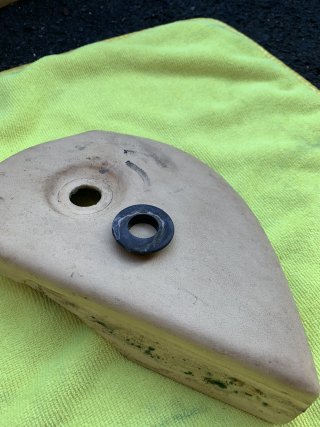
Plastic lug just pushes out
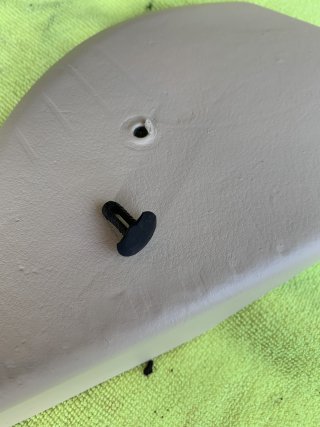
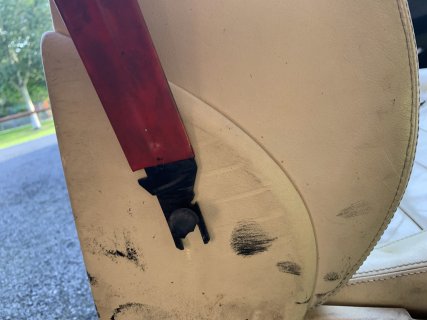
Other side is just held on with a wheel arch liner type plastic stud
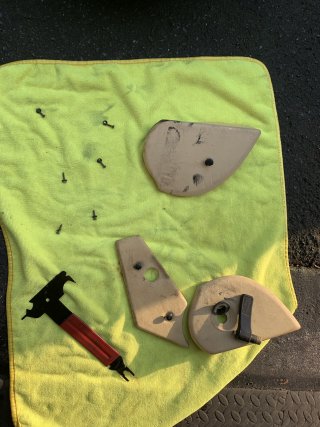
All the bits ready for cleaning up
On the lug side there is a little bracket screwed on to receive the lug so that needed transferring to my original seat back.
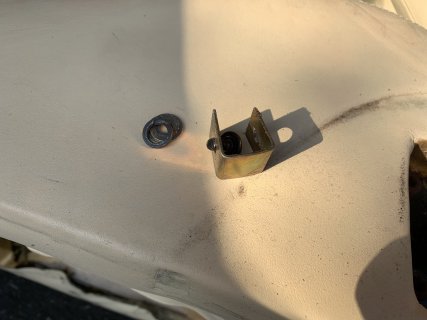
Ready for dying
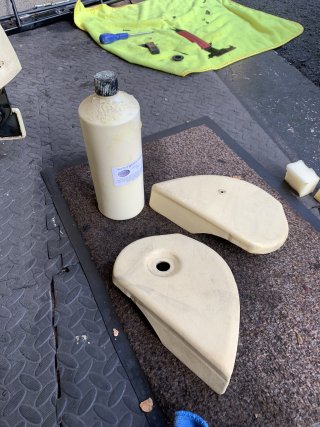
One panel dyed for comparison purposes.
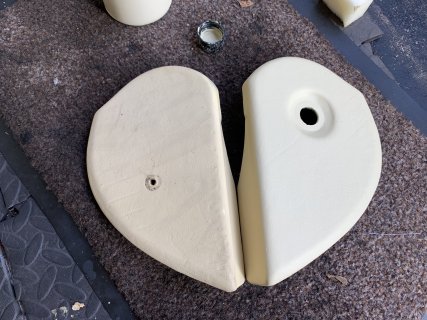
First remove the lever which is held on by a captive alan bolt

Panel just pulls away then.


Plastic lug just pushes out

Other side is just held on with a wheel arch liner type plastic stud

All the bits ready for cleaning up

On the lug side there is a little bracket screwed on to receive the lug so that needed transferring to my original seat back.


Ready for dying

One panel dyed for comparison purposes.

irarref
Active member
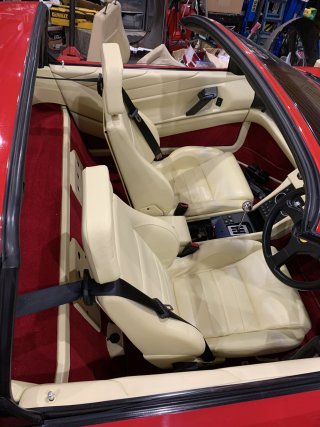
And the end result - driver's seat with a working recliner - both seats upgraded to the later style lever pulls and both seats retaining the shoulder guides - very pleased as it took me the best part of 2 days to do it all including all the dying. I also raised the old seats to get a better matched set of screws so I can secure my seat backs a bit better as the passenger one was a bit loose.
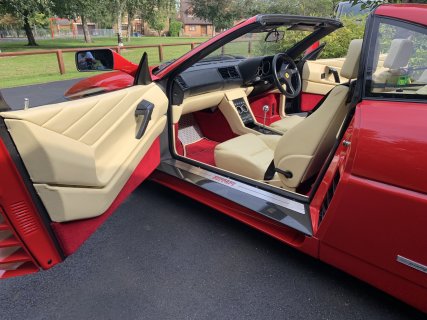
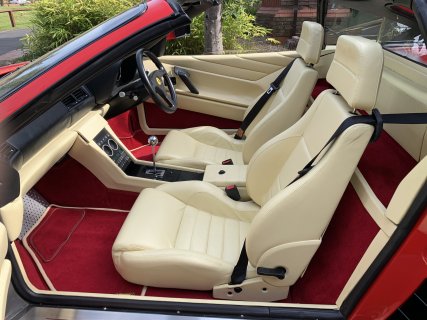
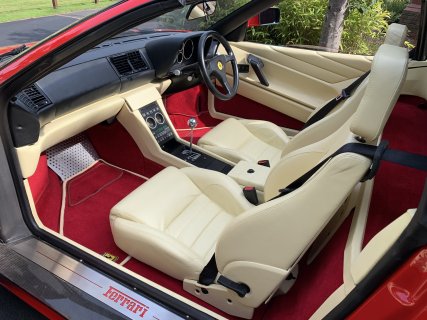
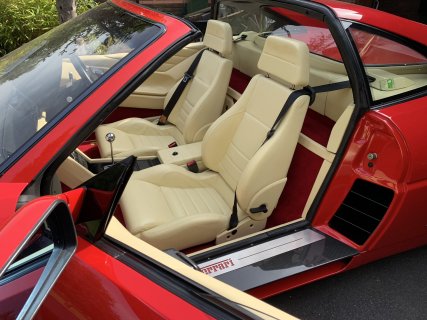
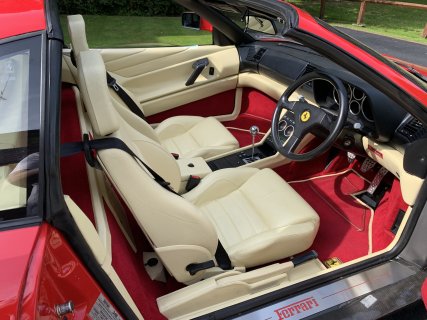
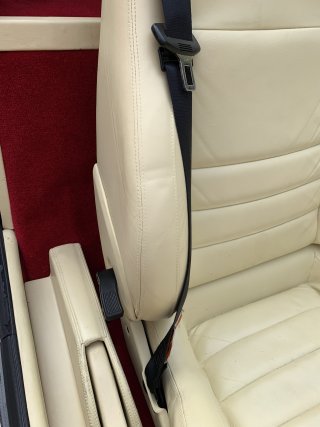
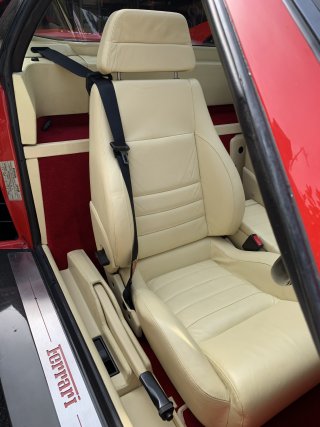
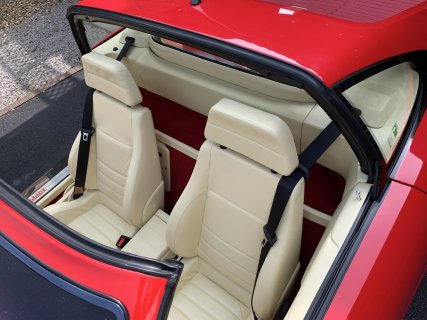


Looking good 
Is that Buffalo leather restorer/dye you're using? Good results from it, which particular product is it?
Is that Buffalo leather restorer/dye you're using? Good results from it, which particular product is it?

